Showing posts with label X-Press It 12mm Double Sided Tape. Show all posts

Wednesday, March 11, 2015

X-Press It Double Sided Tape: Tiny Envelopes

Well today is a little bit of fun, and a gentle reminder that all things are possible with the wonders of X-Press It Double Sided Tape, if you had nothing else left in your adhesive stash this little product will be able to solve all of your sticky situations!

I punched a few little envelopes from FabScraps Papers for today's mini project, it is great to use double sided papers for this as you get a pattern on the inside of the envelope as well:

All you need to secure the envelope is a run of 6mm Double Sided Tape on the lower edge of the two front flaps:

They secure nicely, firm and confident that they are going to stay:

Some little envelopes need some fun little messages, these little notes will be fun to send to a few little ladies in the post:

They fit nicely in the mini envelope and the tape holds the paper securely when the notecards are inserted:

When you have used fancy paper to make envelopes you want a simple but special seal for the back closure, today I have used simple white tissue paper with a strip of 12mm Double Sided Tape, simple press the tape onto the tissue paper and run your knife along the long edges to separate the tape from the sheet of tissue paper:

I like to rip my Double Sided Tape, and for the faux washi this is a great look:

It is not that I have run out of X-Press It Double Sided Adhesive Sheets, I always keep a good stash, but I thought I would show how quick you can build a little square of adhesive to cut out a die cut with a few passes of Double Sided Tape:

It cuts like butter and leaves little if any residue when pushed through a die cutting machine:

So the little tag lets me know which envelope is for which little lady, and there is no risk of the label falling off now that it is secured with Double Sided Tape:


This little group of messages is now ready for delivery, with thanks to X-Press It Double Sided Tape:


Today's little tutorial is a lesson in the basics, it's great to get back to multiple uses for your basic supplies, enjoy!


Pin It

Wednesday, July 23, 2014

Mixed Media Card with Blending Cardstock

Robyn Wood - Happy Birthday
Hello! It’s Robyn joining you today with a project featuring X-Press It Blending Card. Blending Card is perfect for this project as it can happily take a bit wet media without dissolving into a mushy mess. My card features an image stamped onto white tissue paper which is then collaged over stamped/painted Blending Cardstock and further embellished with Copics and glitter sprays.
  • Firstly cut some Blending Card to about A5 size. This is much larger than you need for the finished card but it will give you room to play with the background.
Robyn Wood - WIP
  • Using a flourish/swirl stamp, stamp each of the corners using two shades of blue archival ink.
  • Roughly paint the edges pale blue and the centre yellow.
  • Stamp dragonfly onto the middle of an A5 sized piece of white tissue paper using Momento Tuxedo Black ink.
Robyn Wood - WIP-001
  • Crinkle up the tissue paper, then adhere to Blending Card with X-Press It Triple Tac. Don’t smooth out all the wrinkles, they add lovely texture. Allow to dry well.
  • Colour dragonfly with Copic Markers, blending so that the outside of the wings are darker. Coat wings and dragonfly body with Glossy Accents to give them dimension and protect in the next step.
  • Spray with glitter spray – yellow in the centre and blue around the edges. Allow it to drip and spread, then dry well.
  • Trim image down to suit card front and sponge edges with blue archival ink. Embellish the dragonfly with glitter glue.
Robyn Wood - WIP-002
  • Layer image with blue cardstock and some patterned paper onto a 15cm square black card front using X-Press It Double Sided Tape. As the card may have buckled a little – use more double-sided tape than usual to ensure it lays flat on your card.
  • Add a layered greeting, raised with X-Press It Foam Tape and you are done!
Robyn Wood - Happy Birthday close
Supplies:
  • X-Press It Blending Card
  • X-Press It Triple Tac
  • X-Press It Double Sided Tape
  • X-Press It Foam Tape
  • Momento Ink Tuxedo Black
  • Copic Markers Y04, Y18, YR16
  • White tissue paper
  • Stampendous Dragonfly Vine, Fall Tendril, Happy Messages
  • Ranker Archival ink Manganese Blue & Forget-Me-Not
  • Ranger Glossy Accents
  • Acrylic paint in yellow/blue
  • Glitter glue, glitter sprays in yellow/blue
I hope you enjoyed learning how to create this lovely shimmery dragonfly card. I’d love to see your creations posted to our Facebook page if you make something similar.
Pin It

Wednesday, December 4, 2013

Washi-licious Christmas

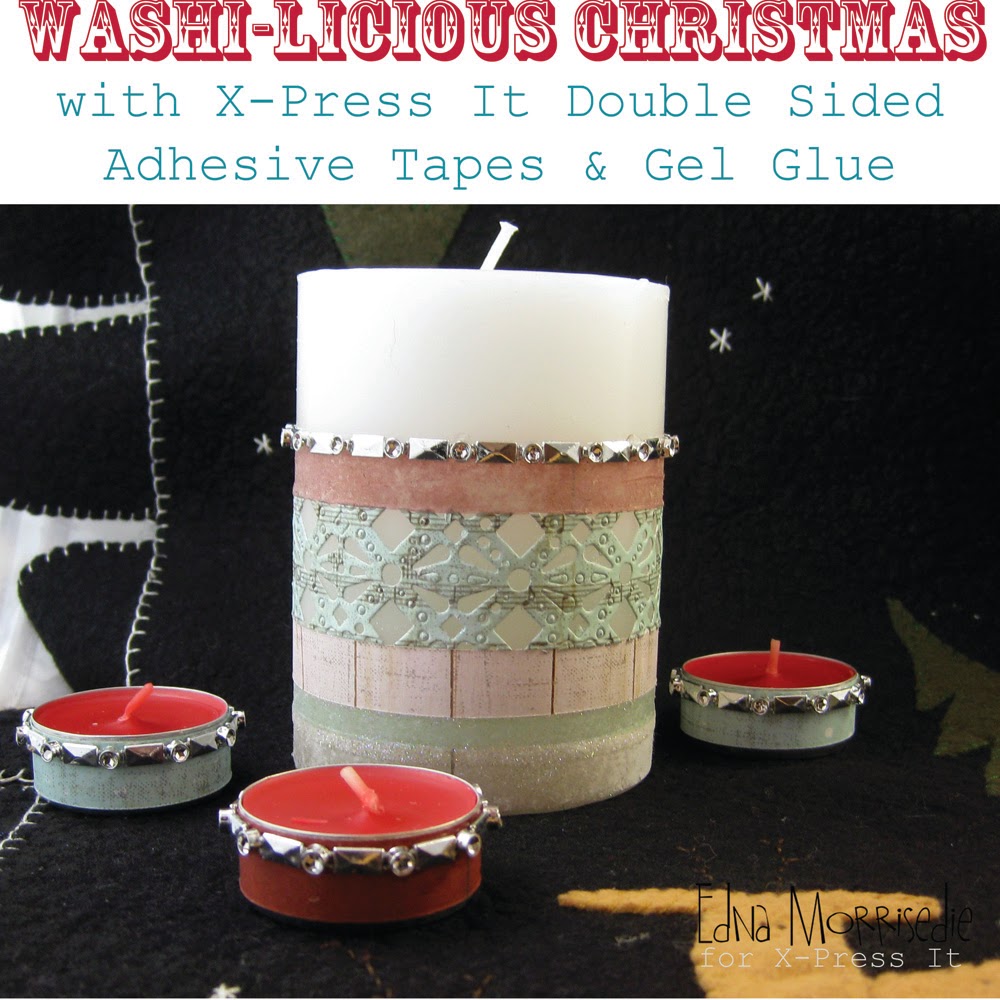
It is definitely time to get the Christmas Decorations out, and this week I am revisiting faux washi tape techniques with the festivities of the season in mind.  It is amazing what a difference a few strips of paper can make to some pretty generic household candles, here is what I started with today:


I wanted to make one feature candle to sit in the middle of a table runner, and then to have different, but co-ordinated, tea-light candles to add to the mix.  With the feature candle I have used two different types of faux washi tape.  The first applies the tape directly to the paper, in multiple strips and then you splice away the strips of faux washi tape.


With one of the strips I have used a cutting die plate to give extra form to the design, the double sided adhesive cuts like butter in any die cutting machine and rarely leaves any residue behind.  This works the same with X-Press It Double Sided Adhesive Sheets too, I just used a double strip of adhesive tape today, the choice is yours.


The second technique sees strips of paper firmly pressed into strips of 12mm Double Sided Adhesive.  Once the paper is adhered, good side down, spritz or brush with water and rub away the backing paper to reveal the very fine upper layer of the paper.  This is like the paper transfer technique used with X-Press It TripleTac, but achieved with Double Sided Adhesive.   You need to be gentle with the rubbing, but the work is worth it to have a different texture of faux washi tape, with a transparent effect as your end result.

DIY Washi Tape Tutorial using X-Press IT Double Sided Adhesive Sheets, by Edna Morrisedie

For the tea light candles, the idea was to cover up the silver exterior of the candles with faux washi tape, co-ordinating the look with the feature candle.  This is simply achieved by using the tape to paper technique from above, I used 12mm double sided adhesive tape for these and it works a dream. 

I have added faux metal embellishment to the tea lights and around the top of the papers on the candle to bring them together.  I adhered these elements with X-Press it Clear Gel Glue

Once the strips of faux washi tape were ready I layered them up the base of the candle, leaving room to run 3mm double sided adhesive around the base of the candle, you can see it in place in this picture.  All I did to apply the glitter is simply remove the backing and rub some fine glitter into the adhered space to add yet another texture to your festive candle.


This is a quick and easy way to bring to add some festivity to your tables and general decorations this Christmas, or all year round with any types of paper and decorations that you prefer.  Double Sided Tape is my most used X-Press It product, its uses are endless, here is what I used in my project today:

X-Press It 3mm Double Sided Adhesive
X-Press It 6mm Double Sided Adhesive
X-Press It 12mm Double Sided Adhesive
FabScraps Papers
X-Press It Clear Gel Glue

And here are my candles out on my very precious felted table runner:


There is still plenty of inspiration to come from the X-Press It Blog this year, however, this is my last tutorial for this year, so may I say thanks for tuning in and all the best for the season... however you may celebrate it!  I look forward to seeing you all in 2014.... EDNA.Pin It

Wednesday, October 2, 2013

FabScraps Cog Album--Layered Page with Anne Patterson

It is Anne Patterson here and I have had the fun task of creating with the Fab Scraps Cog Album and a variety of X-Press IT Products.


The first step I took was to coat the front cover with some Pewter Distress Stain.


The great thing about the X-Press It Glue pen is you can use it for embossing and so I have added some details onto the cogs using the glue pen. 


I have then sprinkled the details with embossing powder.


You then wait for the glue to dry for a little and then you can heat set the powder with your heat gun.


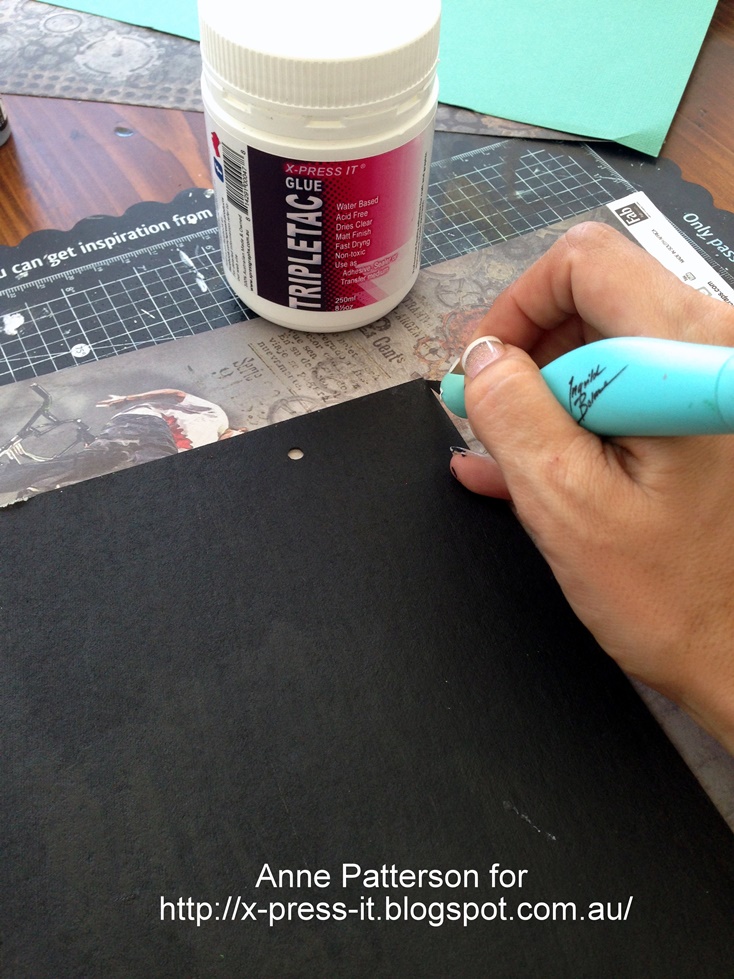
 I have then coated the back page of my album with Triple Tac Glue, and then pressed to the patterned paper.


Then you cut off the excess paper.

I have used some patterned paper to create a pocket to hold some certificates.  i folded over the edge to make it easier to slide the certificates in.


I have then used X-Press It 6mm Double Sided tape long the bottom and sides of the back of the patterned paper.   This I then adhered to the back of one of my album pages.


 I have used my X-Press It 12mm Double Sided tape to adhere some cardstock to the patterned paper background.


I have then used my X-Press It Clear Gel Glue to adhere the additional cog and title embellishments
to my page.


To give the cover a little extra lift, I have put the cover picture on some X-Press it foam tape.


Products I have used in my project are:

X-Press It Tripletac Glue
X-Press It Double-Sided Tape 6mm 
X-Press It Double-Sided Tape 12mm
X-Press It Clear Gel Glue
X-Press It Glue Pen
FabScraps Cog Album
FabScraps Wild at Heart Patterned Paper
FabScraps Wild at Heart Clear Stickers
FabScaps Die-Cut Chipboard Word Rough & Tough

Here is the final project:


The cog album cover lifts to reveal pictures on the inside.


The inside page lifts again to reveal the pocket page with the mining permits, and some more pictures of our outing.


This is a great way to use and create an interactive page, with lots of space for pictures and moments and the process is very similar if you create the whole album instead of a page, but I hope you have enjoyed my share.

Thanks for Looking
Anne
Pin It

Wednesday, August 28, 2013

X-Press It Adhesives--A Sticky Delight!

Hello X-Press It Fans, it's time for another tutorial and this week we are celebrating everything sticky... and the wonderful adhesive qualities of X-Press It Tripletac Glue and Double-Sided Adhesives.  They are used globally for adhering paper to all of our layouts, cards and projects but have so many other great uses... today I provide you with a set of 3 little glass jars, all ready to colour co-ordinate with my extensive button collection... here is what I started with today:


I wanted to colour co-ordinate the lids to my buttons, but keep the details on the actual glass jars subtle, as I like to be able to see through to what is inside, so opted for flocked lids and clear glittered jars.  Flock is a mystery to many but really a fun medium... the real trick of the trade is to use an adhesive that has a thorough coverage but is still pliable for a little while after application, which is Tripletac to a T... this picture shows the flock as a first coat, persist with this textile, you do need multiple coats to get a finish with good coverage, just keep adding the TripleTac to the dried layers... eventually you will finish with a good coverage of "fluff"!


Then it was time to move on to the 3 glass jars, I thought it would be good to have a little variety, so opted for a criss-cross design on one, a ring design on another, and then a bottom section on the third.  In this picture you can see where I have used Double-Sided Tape on two of the jars (ring and criss-cross) and then a ring of masking tape (I used washi tape) a third of the way up the last jar.


The washi tape was used as a mask for the jar below... simply apply a good even coverage of Tripletac to the jar, overlapping the tape, sprinkle with a mountain of glitter and roll the jar to have the glitter travel across the glue and adhere to the jar....from there it is a simple case of pulling off the washi tape to reveal a perfect finished line to the glitter bottom on the jar, set aside to dry for 10 minutes or so...


Then it was onto the taped lines... with the ring design, I used three different sizes of double-sided tape 12mm, 6mm and 3mm.  Pull off backing from all three strips of adhesive at the one time and sprinkle over the glitter, once again rolling the jar to obtain coverage.  Make sure there is good coverage and that you rub the glitter into the tape.  Test that you have full coverage by running your finger around each of the rings, you shouldn't feel any stickiness along the way, if you do, simply add more glitter and rub in with force...


The most important thing to remember when securing glitter with double-sided tape is that to "earn real shine" you need to "buff the glitter", this means that you need to dust off the excess glitter and with the full pad of a finger tip rub the glitter into the tape, the more you rub the shinier the glitter will shine, this is because the particles make full contact with the tape, they adhere well and it also rids the line of tape of any excess glitter, allowing what is left to gain full light reflection, a subtle effect with this clear like glitter, more dramatic with a coloured glitter... try it, it will make you smile!!


With the criss-cross design, you will notice in the first picture that I had only applied tape in one direction, it is important to add the glitter over all the tape that you apply to the jar at the one time, this way you will minimise the "bumps" where the tapes cross over... pull off the backing from the first set of tapes, and then apply a new set of tapes in the opposite direction before adding any glitter.  Once again I have used the 3 sizes of tapes, two of each size in each direction, but you can mix this up to your liking...


Try your adhesives on all sorts of surfaces, there is plenty of variety across the X-Press It range, something for every surface... try all sorts of glass, put the glitter on the inside or the outside, full or partial coverage... looks great on vases, and very special on the outside of votive candle holders, especially when the candle light shines on through... for me though I am very happy with my co-ordinated button jars!

Here is what I used in my project today:

X-Press It Tripletac Glue
X-Press It Double-Sided Tape 3mm
X-Press It Double-Sided Tape 6mm 
X-Press It Double-Sided Tape 12mm
Glass Jars with screw top lids (the ones pickles come in)
Ultra-fine clear glitter
Flocking Powder


I hope you enjoyed this tutorial and try out this technique in your own creative space, enjoy!
Pin It