Showing posts with label X-Press It Triple Tac. Show all posts

Wednesday, February 11, 2015

X-Press It TripleTac Glue - Transfer Medium - Canvas

Today I am going to walk you through the process of using X-Press It’s TripleTac Glue as a transfer medium.
I could have also called this blog post “turning bad into good”!
I will show you how to work through a process, even when things don’t go quite how you expect and not giving up on a creative thought.
Using TripleTac as a transfer medium is one of my favourite techniques to play with.
It is super easy.
All you need is a canvas, X-Press It TripleTac Glue and something to transfer. It could be a pattern paper print, a print from a magazine or a photo.

SharmaineKruijver_XPressIt_TripleTac1

Firstly the photo.
The photo is printed straight onto copy paper.
Did I mention this technique was easy?
It doesn’t matter if it’s inkjet or laser, although laser works better.
You will notice my photo is on the dark side.
I wasn’t sure how it was going to look once transferred so used the whole process as an experiment.

Once you’ve selected your canvas and printed off a photo to fit
cover the photo side of the paper with TripleTac.

SharmaineKruijver_XPressIt_TripleTac2

Then place this side of the paper down on to your canvas.

SharmaineKruijver_XPressIt_TripleTac3

Allow the glue to dry, you can use a heat gun or allow to dry naturally (which can take a few hours but best results are from waiting 24 hours).

Now the great thing about this technique is that you can use the transfer medium on all sorts of things.
Transfer on to wood, cardboard or even cardstock. Anything flat that won’t move when you follow the next part of the process.

Once the glue is dry, use a paint brush and apply some water

SharmaineKruijver_XPressIt_TripleTac4

Then working in small sections start rubbing back the layer of paper to reveal the photo below.

 SharmaineKruijver_XPressIt_TripleTac5

By working in small sections you will soon see where the paper still needs rubbing back.

SharmaineKruijver_XPressIt_TripleTac6

Be careful not to rub too hard or too far as you will start to remove the photo.
You will see this happened in small sections of my canvas. You will see that I made this “mistake” work to my advantage.
Once you have removed the paper membrane from the whole canvas give it a clean with a damp cloth (I like to use my hand that has been dampened with a little water).
Allow to dry. Then cover with another coat of TripleTac to seal the print, making sure the coat is flat or it will dry streaky (as it did on my canvas…more on that below)

SharmaineKruijver_XPressIt_TripleTac7

And that’s the whole process.
Told you it was easy!
You can now add some paint around the edge of your canvas to finish it off.
For my canvas I took it a little step further.

SharmaineKruijver_XPressIt_TripleTac8

I have painted some layers around my photo and then covered the “white space” with some text.
I used the glue streaks to my advantage by highlighting them to emphasis texture and dimension.

SharmaineKruijver_XPressIt_TripleTac9

The result

SharmaineKruijver_XPressIt_LoveCanvas

Hopefully this inspires you to give this technique a go.
Why not grab your bottle of TripleTac and experiment.
Have a creative week
Sharmaine

Pin It

Wednesday, June 11, 2014

Sticky Barc Cards

Hello crafty people! It's Teresa here, and I'm excited to bring you a couple of cards I made using the amazing Sticky Barc.

This amazing product is really actual wood! It's sliced extra thin, making it flexible and easy to cut with any die. It also loves being coloured and today I've used Copic markers. Being translucent, the natural wood grain pattern still shows through.

Here's the first card:


 First of all, I cut a piece of White Birch Sticky Barc to 7.5 x 9.5 cm and die cut the silhouette and wreath from it:


Next I coloured the individual parts with a different Earth tone Copic marker. I left the silhouette shape uncoloured for contrast:


I assembled the card using some double sided tape to adhere Hazel and Ruby Crazy for Chevy wrapping paper for the card front. Adding the Sticky Barc to the card was a simple matter of removing the backing paper - this stuff is also adhesive! I wanted to create a parquetry effect, so I added a couple of coats of Tripletac for shine:

The sentiment at the bottom is some of the Colourbock Quotes Fat Roll Washi Tape stuck on some cardstock and attached to the card with foam tape.


Being so flexible, I wanted to see how Sticky Barc would cope with being embossed. Lovely! Here it is cut out with a feather die. I coloured one feather with a Copic marker and sponged some Distress Ink on the other to bring out the detail.


Thanks for stopping by! I hope you've seen what a wonderful product Sticky Barc is. I look forward to using it to add the on trend wood veneer look to many more projects.

Products I've used today:
Sticky Barc
Copic markers
Hazel and Ruby Crazy for Chevy wrapping paper
Tripletac
Foam tape
Colourbock Quotes Fat Roll Washi Tape 


Pin It

Wednesday, March 12, 2014

Recycled Candle Holder

I just love being able to reuse household items to create something different.
I’m going to show you how I used X-Press It’s Triple Tac Glue to help create a candle holder.

SharmaineKruijver_XPressIt_TripleTacGlue6

The task called for a clean jar, tissue paper and some glue.

SharmaineKruijver_XPressIt_TripleTacGlue1

The jar would have been better if it was smaller but this one did the job.
You might see that i’ve used the gorgeous Hazel & Ruby tissue paper. It was perfect for this task.

SharmaineKruijver_XPressIt_TripeTacGlue2

It has a little more give than regular tissue paper and worked like a dream when I spread a layer of Triple Tac on the back.

SharmaineKruijver_XPressIt_TripleTac3

I then covered the jar with the paper. I wasn’t too fussed by the creases, they just add to the dreamy glow later!

SharmaineKruijver_XPressIt_TripleTacGlue4

I could have left it at this step or I could have added some twine, which could have been glued in place if you wanted.

SharmaineKruijver_XPressIt_TripleTacGlue5

But I wanted a different glow so I gave the tissue paper a wash with some water colour before adding the twine.

SharmaineKruijver_XPressIt_TripleTacGlue_Candle

The end result was a gorgeous glow.
Love that the Triple Tac dries clear and holds so well.
Can you imagine a row of these, in different sizes??
Or add some wire to create some hanging lanterns.
What great ideas have you got to revamp every day household items??

Sharmaine

Pin It

Wednesday, January 29, 2014

Group Card FabScraps Style--Birdcage Album

For this my first X-Press It Post for the year I had the very versatile FabScraps Birdcage Album to play around with along with a selection of fabulous floral papers and bird themed chipboard.  I am not much of a photo keeper, so opted turn this little album into a group card, something I am regularly asked to produce when work colleagues celebrate special occasions, large store bought cards are rather drab, and it is always nice to present group messages over multiple layers, so thought this a perfect use for this album as it has many pages, of all different shapes, that very cleverly overlap one another.  Here is what I started with today:


I have been know to take my Copic Ink to the covers of mini albums but this time I got to try out Free Flow and Liquid Concentrate paints, the beauty of these is that you use very little and can turn the paint into watercolour consistency without loosing any vibrancy of colour.  I mixed equal portions of Pthalo Green and Violet to colour match the chipboard with the papers I chose to use today, using a piece of acetate as my palette, I like a clear palette as you get a good idea of the actual colour as it is mixed. 


I alternated between watercolour washed pages and paper covered pages adhering the paper with X-Press It TripleTac to ensure a strong and even bond.


Many of the album pages can now be written on directly as desired, however, I made a couple of little book inserts for interest and to maximise writing space these came together easily with the paper scraps left over from covering the pages, using a plain selection for the writing space and trimming the stepped edges with the co-ordinating papers.


 The Die Cut Words are covered with a thick silver medium and then adhered to various pages with X-Press It Clear Gel Glue for strong bond.


Now that the pages are all covered it is time to focus on the front cover, I painted a large feather in co-ordinating silver and then used different strengths of the paint, watercolour style once again, to colour 3 white flowers in different strengths of colour.  This is easily achieve by starting with the darker colour and then diluting the water to step down to the next lighter shade, and so on...


You can see the three varying shades on the cover, all made from this one little pot of paint and water, silver highlights across the cover and the flower centres tie all of the elements together.


See how the different shaped pages cross over one another on the inside of the album, I like this feature it allows the next page to be previewed whilst enjoying what comes before it.


The back cover is one piece and flat, so this helps to keep the different layers steady and add a consistency to how this sits once the D rings are attached at the four side points.


Here are the X-Press Graph-X Products I used in my project today:
Die Cut Birdcage Album
FabScraps Papers:
Lilac Delight
Lilac Delight 2
Butterfly Pink
FabScraps Die Cut Peacock Feather
FabScraps Die Cut Butterflies
FabScraps Die Cut Words:
Moments
Dreams & Wishes
Dance Love Sing
X-Press It Clear Gel Glue
X-Press It TripleTac
Chromacryl Fluid Concentrate: Violet
Atelier Free Flow: Pthalo Green


I hope this inspires you to think about group cards in a new context, such is the versatility of these little FabScraps Albums, go ahead impress your colleagues and friends with one of these!

Until next time, 

Pin It

Wednesday, January 15, 2014

Ocean Waves Canvas

Welcome back X-Press IT Fans, and I hope you had a fabulous Christmas and New Year.

Anne here to share with you a canvas I have created using the FabScraps Beach Comber Collection and a HUGE Variety of X-Press IT Products.

Beach Comber Canvas with X-Press IT products

Products Used:

Fab Scraps Beach Comber Paper
Fab Scraps Beach Comber Chipboard

Adhesives
X-Press IT Sticky Barc

Firstly I did some prep work for the canvas, by giving it a coat of white paint and added some blue flecks into it. 

Painting the Canvas and adding blue flecks

I then set the canvas aside to dry and then painted my Ocean Waves Chipboard.

Painting Chipboard

Once the chipboard was dry, I then used some X-Press IT Clear Glue to coat the top, which creates an awesome clear gloss accent when dry.

X-Press IT Clear Gel Glue makes an excellent glossy coat.

Once the canvas is dry, I took some Beach Combers Patterned Paper, and cut it down to be about 7" wide, and then tore it into four pieces.    I have then used X-Press IT Triple Tac to adhere it to the canvas, in layers, with a layer of crumpled Cellophane between.


Using X-Press IT Triple Tac on Canvas

X-Press IT Triple Tac as Adhesive for canvas

Then, using the Triple Tac, I have used a cloud template, and put the triple Tac onto the template to create two cloud shapes and then sprinkled with Shaved Ice.  the Triple Tac is and excellent adhesive for applying these type of products.

X-Press IT Triple Tac and templates

I have then used some of the X-Press IT Sticky Bark, which is so easy to adhere to chipboard elements.  Just peel back the adhesive, then place your chipboard face down.   You then use a craft knife to cut around the outside of the chipboard element.

Using X-Press It Sticky Barc to cover Chipboard Elements

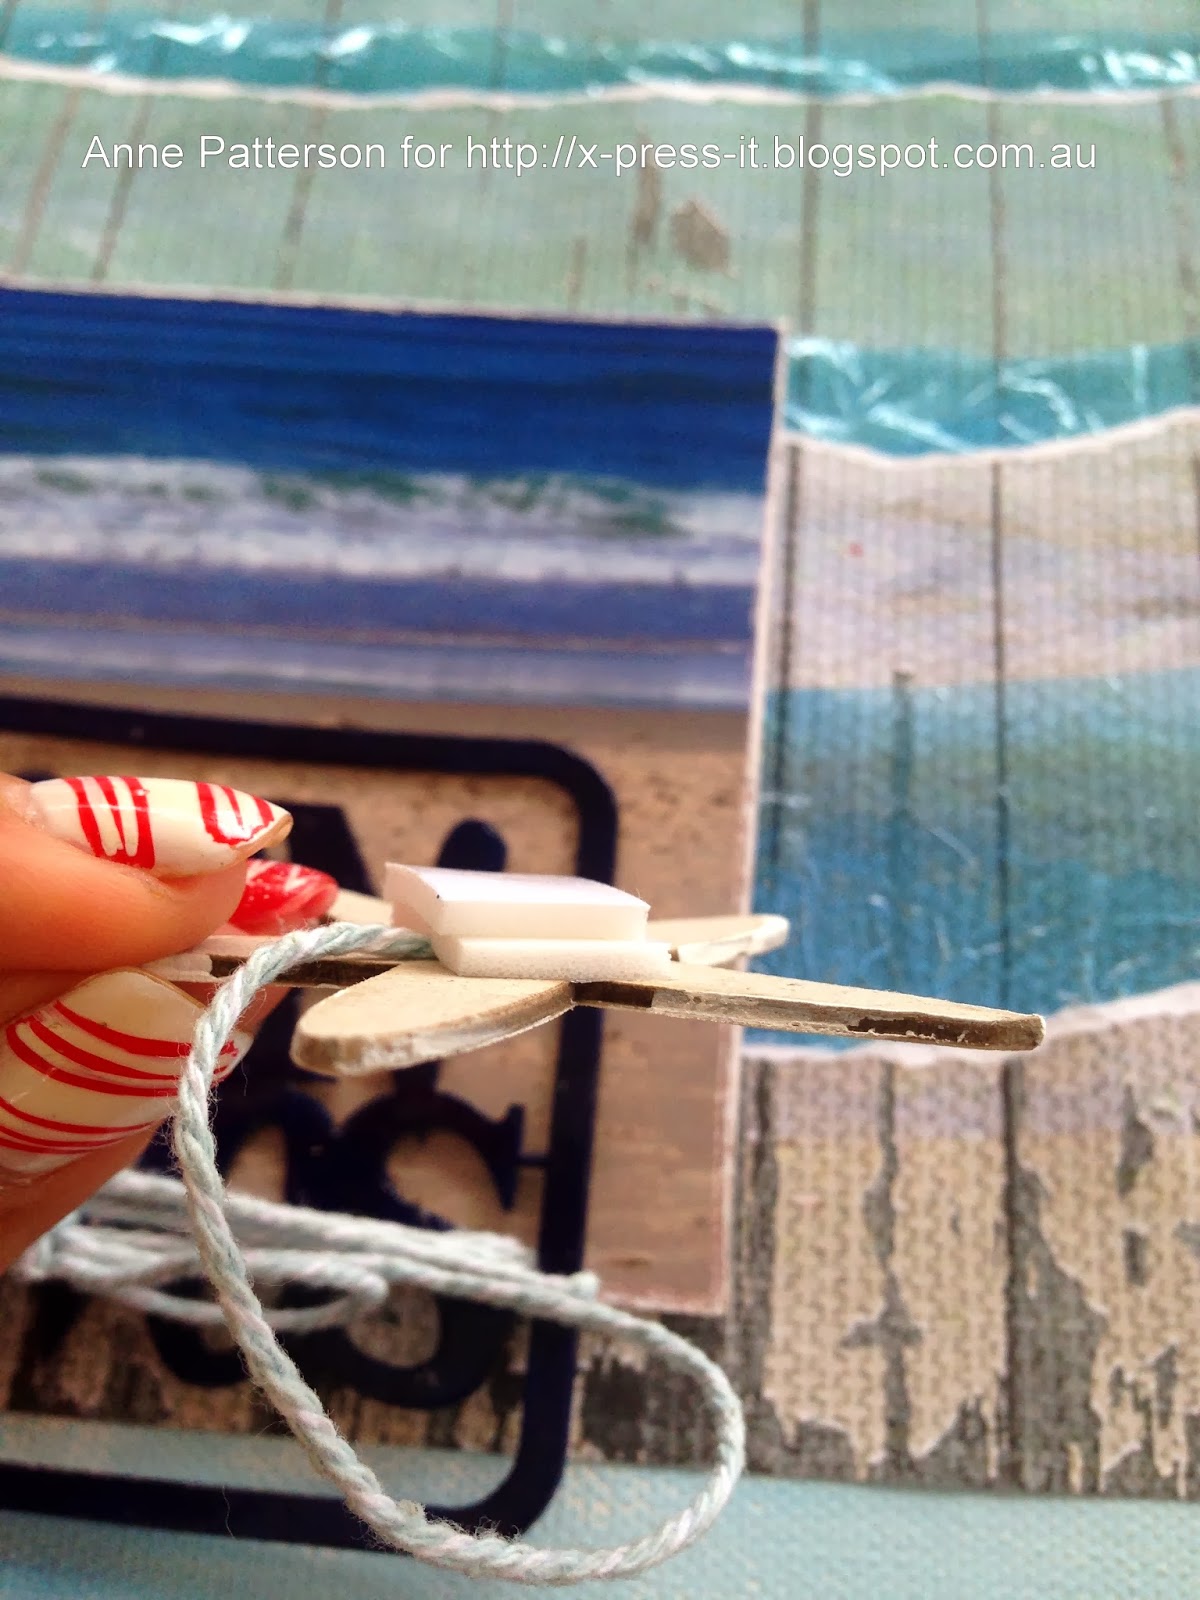
I love creating layers, so the next step was to start using some X-Press IT Foam Tape.
Using X-Press IT Foam Tape to add Dimension

Using it just gives a lift to some elements on your page.

Using X-Press IT Foam Tape to add Dimension

If you want to layer, so I wanted my picture to be on the same level as the lifted element, I made sure that I worked out where to put my Foam Tape before adhering it.

Using X-Press IT Foam Tape to add Dimension

Ever wondered how to make string stay in the right place.  Well I discovered the X-Press It Glue pen is THE solution.  Just draw where you want the string to adhere to then press the string into position.

Using the X-Press IT glue pen to adhere Twine

Need EXTRA lift, I am known to double up my foam tape.

Double Up on your X-Press it Foam Tape for extra Dimension

The X-Press IT Gel pen is also the perfect solution for adding little details of glitter.


And don't forget it is the PERFECT tool for gluing on your sequins.  Just draw a dot, where you want your sequin to go, then drop the sequin into position.

Using X-Press IT Glue Pen for Sticking Sequins in Place

After adding a couple of other embellishments, and doing some doodling, here is the final canvas.

Ocean Waves Canvas by Anne Patterson using X-Press IT Products.

Thanks for Looking

Pin It