Wednesday, December 11, 2013

Shabby Gate Album

Hi X-Press It fans.
Sharmaine here and today I’m sharing a step by step on how I created a frame using the FabScraps Shabby Gate Album.

IMG_0300

Products used:
FabScraps Shabby Gate album
Fabscraps "Shabbylicious" papers
FabScraps chipboard
Fabscraps filigree
Chromacryl paints
Lindy’s Stamp Gang Embossing Powder
X-Press It Double sided tape
X-Press It Clear Gel Glue

The very first thing I did was pulled out the back of the album and covered it with glue, using the X-Press It Clear Gel Glue. The quickest way, i’ve found, to do this is spreading it with a palette knife.

IMG_0303

Next I placed the glue side down onto some pattern paper.

IMG_0304

Using an emery board I removed the excess paper from the sides.

IMG_0306

I repeated this process for two of the page inserts and using my finger I then added some paint around the edges.

IMG_0313

I also added a coverage of paint to the gates

IMG_0315

Before stamping over them with a text stamp and then embossed this with some Silver Moon Sapphire Embossing Powder.

IMG_0316

I then added some touches of blue ink

IMG_0318

Before adhering the gates to the page inserts.

IMG_0319

Next I repeated the stamp/emboss process to a piece of FabScraps chipboard

IMG_0320

And a metal butterfly.

IMG_0323

I added some more pattern paper (also distressed and inked) to the back

IMG_0322

And then put the frame together, tying it up with some ribbon.

IMG_0324

I used a post card instead of a photo.

IMG_0329

Really like the subtle texture the embossing creates.

IMG_0331

I also left enough room so you could add either a landscape or a portrait 4x6 photo.

IMG_0333

I didn’t fully glue the “Together” down so that a new photo could easily be tucked in behind.

IMG_0332

Think this would make a great wedding gift,

IMG_0334

Or even for Christmas.

IMG_0335

Hope you are feeling inspired to create.
Happy Christmas to you all and I wish you all the very best for the New Year.
Happy creating
Sharmaine

Pin It

Wednesday, December 4, 2013

Washi-licious Christmas

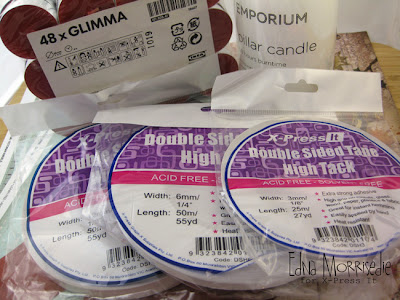
It is definitely time to get the Christmas Decorations out, and this week I am revisiting faux washi tape techniques with the festivities of the season in mind.  It is amazing what a difference a few strips of paper can make to some pretty generic household candles, here is what I started with today:


I wanted to make one feature candle to sit in the middle of a table runner, and then to have different, but co-ordinated, tea-light candles to add to the mix.  With the feature candle I have used two different types of faux washi tape.  The first applies the tape directly to the paper, in multiple strips and then you splice away the strips of faux washi tape.


With one of the strips I have used a cutting die plate to give extra form to the design, the double sided adhesive cuts like butter in any die cutting machine and rarely leaves any residue behind.  This works the same with X-Press It Double Sided Adhesive Sheets too, I just used a double strip of adhesive tape today, the choice is yours.


The second technique sees strips of paper firmly pressed into strips of 12mm Double Sided Adhesive.  Once the paper is adhered, good side down, spritz or brush with water and rub away the backing paper to reveal the very fine upper layer of the paper.  This is like the paper transfer technique used with X-Press It TripleTac, but achieved with Double Sided Adhesive.   You need to be gentle with the rubbing, but the work is worth it to have a different texture of faux washi tape, with a transparent effect as your end result.

DIY Washi Tape Tutorial using X-Press IT Double Sided Adhesive Sheets, by Edna Morrisedie

For the tea light candles, the idea was to cover up the silver exterior of the candles with faux washi tape, co-ordinating the look with the feature candle.  This is simply achieved by using the tape to paper technique from above, I used 12mm double sided adhesive tape for these and it works a dream. 

I have added faux metal embellishment to the tea lights and around the top of the papers on the candle to bring them together.  I adhered these elements with X-Press it Clear Gel Glue

Once the strips of faux washi tape were ready I layered them up the base of the candle, leaving room to run 3mm double sided adhesive around the base of the candle, you can see it in place in this picture.  All I did to apply the glitter is simply remove the backing and rub some fine glitter into the adhered space to add yet another texture to your festive candle.


This is a quick and easy way to bring to add some festivity to your tables and general decorations this Christmas, or all year round with any types of paper and decorations that you prefer.  Double Sided Tape is my most used X-Press It product, its uses are endless, here is what I used in my project today:

X-Press It 3mm Double Sided Adhesive
X-Press It 6mm Double Sided Adhesive
X-Press It 12mm Double Sided Adhesive
FabScraps Papers
X-Press It Clear Gel Glue

And here are my candles out on my very precious felted table runner:


There is still plenty of inspiration to come from the X-Press It Blog this year, however, this is my last tutorial for this year, so may I say thanks for tuning in and all the best for the season... however you may celebrate it!  I look forward to seeing you all in 2014.... EDNA.Pin It

Wednesday, November 27, 2013

Personalised Gift Bags featuring X-Press IT Double Sided Sheets

Hi Anne here today to share with you a really simple way of personalising gift bags, to give them that little something extra in this gift giving season.


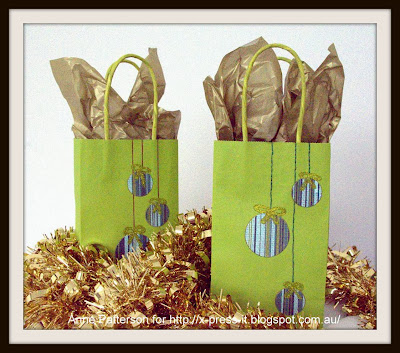
I have found some simple Kraft gift bags, and have decorated them.  Here is how.


Taking your X-Press IT Double Sided Sheets, remove one side and adhere to your Patterned Paper.  This stuff is totally FABULOUS as it is like a GIANT piece of double sided tape.  It made my bag decorating process super easy.


I have used a 2" and 1" circle punch and easily punched out some quick circles.


Remove the other side of the doubled sided sheet, and adhere in place on the bag.


Using my X-Press it Thick Glue Pen, I drew some bows on the top of the circles.  Then sprinkled glitter onto the glue.


 There are two ways you can add the string.  The quick method, using a brown pen....


But as you know, I can't go past a good bit of needle work (which I have done on my other sample).


Products I have used in my project are:

X-Press It Double-Sided Sheets 
X-Press It Glue Marker
FabScraps Birds and Bees

Extra products:
Green Kraft Bags
Glitter
Brown pen or Green DMC Thread

So here they are, the finished gift bags.


Hope you liked my super easy bags and see that you could whip up a dozen of these in a very short time.  Thanks for Looking

Pin It
Wednesday, November 13, 2013

Angelic Christmas Layout

Sharmaine here with a layout featuring the Angelic Christmas range from Fabscraps 

IMG_9864

Products used:
FabScraps “Angelic Christmas” papers
FabScraps “Angelic Christmas” chipboard
Lindy’s Stamp Gang Embossing Powder
X-Press It Double sided tape
X-Press It Foam tape
Fabscraps pearls

After choosing my background paper (“Special Times”)
I pulled out a snowflake chipboard piece

IMG_9866

Using some double sided tape I adhered the chipboard to an acrylic block

IMG_9867

And stamped the image on my paper,
then embossing it with some “Silver Moon Sapphire” embossing powder.

IMG_9869

I then reused the chipboard

IMG_9871

By covering them with some paint, red

IMG_9873

and white,

IMG_9875

And then added some sparkle with gold nail polish.

IMG_9874

While this was drying I ripped a strip of paper from a piece of “”Blessed Times 1”

IMG_9865

And using this ripped shape as my guide I ripped slightly larger pieces from “Bauble Delight” and “I Believe”

IMG_9876

Once these were added to my page I stuck on the chipboard snowflake, to which I had spotted some snow (white nail polish).

IMG_9884

I then had fun colouring another piece of chipboard “Merry Christmas”.

IMG_9885

Adding more sparkle to my page.

IMG_9887

The end result…

SharmaineKruijver_XPressIt_Chrismas

A happy little reminder of Christmas time.
Isn’t the print on the pattern paper just gorgeous!
Dreamy even?!
I hope this post might inspire you to have fun creating.
Take care
Sharmaine

Pin It

Wednesday, November 6, 2013

Blog Hop Winners

First of all, we'd like to say a big THANK YOU to everyone who participated in the X-Press It Blog Hop...

The lucky 8 winners are:

X-Press It Blog #1 - Kerry From The Beautiful Barossa Valley
X-Press It Blog #2 - Jo Murray
X-Press It Facebook - Philipa Chang
X-Press It Instagram - Pipsicle007
Edna's Blog - Angie Brown
Sharmaine's Blog - Morgyn Mlinarek
Kate's Blog - Sammi
Anne's Blog - Jenny G

Please send an email to sascha@xpressgraphx.com.au with your postal details so we can send your TREATS!!Pin It

Vintage Glam TripleTac Style

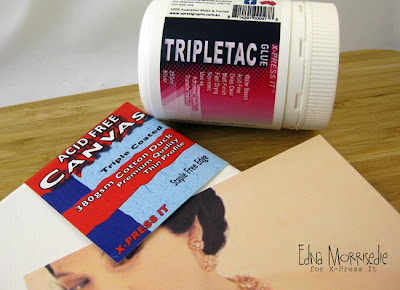
Welcome to another X-Press It Tutorial, this week we are focusing on the use of TripleTac to transfer images to canvas.  Here is what I started with for the photo transfer element of this piece:


I used a fashion photo for my canvas by the very vintage-ly talented karen radkai, it spoke glamour to me, and I knew the muted tones would work well once transferred, and mesh nicely with a good splash of glitter.

You can print off any photo that you have and use the image transfer technique to achieve the same look.  There is a little video on the image transfer technique at this link, and the instructions are also provided on the side of the packaging on each tub of X-Press It TripleTac Glue.

The first step in the image transfer technique is to apply X-Press It TripleTac Glue to the image, apply a good coverage of TripleTac Glue, all the way to the edges of the image, and then simply press the image, face side down, onto the canvas.  Make sure the glue and image makes good contact with the canvas by running your hands across the top of the covered canvas and pressing firmly as you go.


The next step involves an overnight wait, or 3 hours in a warm environment... or you can do what I do and dry it with a heat gun.  The aim is to ensure that all the moisture leaves the glue.  Once you are confident that the glue has dried it is time to reveal the image...  This is simply achieved by taking the same paint brush, but dipped in water, and wetting sections of the covered canvas, then using your fingers to rub the paper backing away from the image.  It is best to work in small areas, re-wetting the areas as you move along, and slowly removing the backing paper.


Once you have revealed your image, which will be in reverse to what you printed, leave to dry for a while, once dry you will be able to determine if you have removed all, or enough of the backing paper. The amount of backing paper you remove is totally up to you, the more you leave on the more shabby chic your end result will be.


I chose this image with the intent of gifting a little "It's OK to be Glamorous" Canvas to a fashionista friend, and also because it had some specific details that would take extra bits of glam.  I wanted to feature the necklace and chose some silver beads from very deep in my crafting stash, applying a pool of TripleTac Glue directly atop the outline of the necklace on the image, then it was as simple as pooling the beads on top, waiting a few moments for them to settle and then tipping the canvas upside down to remove the excess.  TripleTac is super strong, so the beads will stay in place forever more!


Then for a little bit of different texture I took two different sizes in the Glue Marker and Glue Pen to the front of the dress, adding a thicker line across the top, and dots of glue on the frills on the front of the dress, spilling glitter glass in this section to adhere to the two different sizes of glue...


A quick quote printed and cut up to add a touch of sentiment and the elements of this were finished... you will note that I have painted the sides grey first, and then covered with silver paint, extending some of the paint to the front of the canvas to continue the shabby feel.


You can leave the canvas as is, in this case I wanted a gloss finish, so have gone back over the entire surface with TripleTac Glue, which now serves the purpose of a sealer.  This leaves a glossier finish, and also allows some of the colour from the original image to deepen again.


You could use your own photos, magazine images or scrapbook paper to transfer onto such canvases, the results are endless!

Here is what I used in my tutorial today:
X-Press It TripleTac Glue
X-Press It Glue Marker
X-Press It Glue Pen
X-Press It Canvas


Have fun with this technique, dig deep in the stash and see what you can find to secure with the amazing X-Press It TripleTac Glue and Glue Markers!

Thanks for tuning in, Edna.


Pin It