Showing posts with label Sticky Barc. Show all posts

Wednesday, November 19, 2014

Sticky Barc and it’s endless uses

Have you used Sticky Barc before?
I hadn’t and I was curious to know just what it could do.
So I gave it a test drive.
First step was to cut a piece to A4 size and run it through my printer.
It cut just like butter. I was afraid it might “shatter” but it didn’t.
I thought the printer ink might smudge. It didn’t.

IMG_5278
Free Printable found
HERE

I cut out one of the images and decided to make a journal page with it.
(You can read more about that on my blog).

IMG_5279

I used one of the images and painted over it with some water colour paint.
I love the way the printer ink feathered out as it bled through the wood grain.

IMG_5284

Now because the Sticky Barc is adhesive I thought it would make great deco tape.
I cut off a scrap and stuck it flat using some double sided tape.

IMG_5302

Then I simply stamped a repeated pattern over the Sticky Barc.

IMG_5303

Easy as that!
Another gift idea that was a great way to use up the leftovers was to stamp a tag shaped stamp onto the Sticky Barc.

IMG_5304

I then cut out the shapes and they were ready to be used.
You could write on them, run them through the typewriter or printer, or add some alpha stickers.

IMG_5307

Great for gift tags or labels on bottles (the adhesive backing makes it super simple for that!).

IMG_5314

You could emboss some too or even use a die cut machine or electronic cutting machine to make other amazing die cut shapes.
Here is the journal page I made using the bird image that I printed onto the Sticky Barc.

SharmaineKruijver_XPressIt_ArtJournal

Hope you give Sticky Barc a test run too. It’s fun medium to play with.
Have a creative week
Sharmaine.

Pin It

Wednesday, June 11, 2014

Sticky Barc Cards

Hello crafty people! It's Teresa here, and I'm excited to bring you a couple of cards I made using the amazing Sticky Barc.

This amazing product is really actual wood! It's sliced extra thin, making it flexible and easy to cut with any die. It also loves being coloured and today I've used Copic markers. Being translucent, the natural wood grain pattern still shows through.

Here's the first card:


 First of all, I cut a piece of White Birch Sticky Barc to 7.5 x 9.5 cm and die cut the silhouette and wreath from it:


Next I coloured the individual parts with a different Earth tone Copic marker. I left the silhouette shape uncoloured for contrast:


I assembled the card using some double sided tape to adhere Hazel and Ruby Crazy for Chevy wrapping paper for the card front. Adding the Sticky Barc to the card was a simple matter of removing the backing paper - this stuff is also adhesive! I wanted to create a parquetry effect, so I added a couple of coats of Tripletac for shine:

The sentiment at the bottom is some of the Colourbock Quotes Fat Roll Washi Tape stuck on some cardstock and attached to the card with foam tape.


Being so flexible, I wanted to see how Sticky Barc would cope with being embossed. Lovely! Here it is cut out with a feather die. I coloured one feather with a Copic marker and sponged some Distress Ink on the other to bring out the detail.


Thanks for stopping by! I hope you've seen what a wonderful product Sticky Barc is. I look forward to using it to add the on trend wood veneer look to many more projects.

Products I've used today:
Sticky Barc
Copic markers
Hazel and Ruby Crazy for Chevy wrapping paper
Tripletac
Foam tape
Colourbock Quotes Fat Roll Washi Tape 


Pin It

Wednesday, January 15, 2014

Ocean Waves Canvas

Welcome back X-Press IT Fans, and I hope you had a fabulous Christmas and New Year.

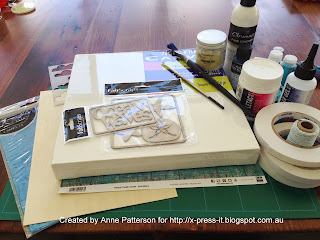
Anne here to share with you a canvas I have created using the FabScraps Beach Comber Collection and a HUGE Variety of X-Press IT Products.

Beach Comber Canvas with X-Press IT products

Products Used:

Fab Scraps Beach Comber Paper
Fab Scraps Beach Comber Chipboard

Adhesives
X-Press IT Sticky Barc

Firstly I did some prep work for the canvas, by giving it a coat of white paint and added some blue flecks into it. 

Painting the Canvas and adding blue flecks

I then set the canvas aside to dry and then painted my Ocean Waves Chipboard.

Painting Chipboard

Once the chipboard was dry, I then used some X-Press IT Clear Glue to coat the top, which creates an awesome clear gloss accent when dry.

X-Press IT Clear Gel Glue makes an excellent glossy coat.

Once the canvas is dry, I took some Beach Combers Patterned Paper, and cut it down to be about 7" wide, and then tore it into four pieces.    I have then used X-Press IT Triple Tac to adhere it to the canvas, in layers, with a layer of crumpled Cellophane between.


Using X-Press IT Triple Tac on Canvas

X-Press IT Triple Tac as Adhesive for canvas

Then, using the Triple Tac, I have used a cloud template, and put the triple Tac onto the template to create two cloud shapes and then sprinkled with Shaved Ice.  the Triple Tac is and excellent adhesive for applying these type of products.

X-Press IT Triple Tac and templates

I have then used some of the X-Press IT Sticky Bark, which is so easy to adhere to chipboard elements.  Just peel back the adhesive, then place your chipboard face down.   You then use a craft knife to cut around the outside of the chipboard element.

Using X-Press It Sticky Barc to cover Chipboard Elements

I love creating layers, so the next step was to start using some X-Press IT Foam Tape.
Using X-Press IT Foam Tape to add Dimension

Using it just gives a lift to some elements on your page.

Using X-Press IT Foam Tape to add Dimension

If you want to layer, so I wanted my picture to be on the same level as the lifted element, I made sure that I worked out where to put my Foam Tape before adhering it.

Using X-Press IT Foam Tape to add Dimension

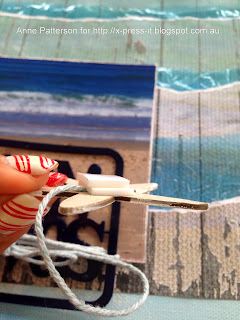
Ever wondered how to make string stay in the right place.  Well I discovered the X-Press It Glue pen is THE solution.  Just draw where you want the string to adhere to then press the string into position.

Using the X-Press IT glue pen to adhere Twine

Need EXTRA lift, I am known to double up my foam tape.

Double Up on your X-Press it Foam Tape for extra Dimension

The X-Press IT Gel pen is also the perfect solution for adding little details of glitter.


And don't forget it is the PERFECT tool for gluing on your sequins.  Just draw a dot, where you want your sequin to go, then drop the sequin into position.

Using X-Press IT Glue Pen for Sticking Sequins in Place

After adding a couple of other embellishments, and doing some doodling, here is the final canvas.

Ocean Waves Canvas by Anne Patterson using X-Press IT Products.

Thanks for Looking

Pin It

Wednesday, June 19, 2013

Sticky Barc: A Masculine Solution

Today’s tutorial is all about X-Press It’s newest family member Sticky Barc, which is a very fine sheet of wood, yes real wood, cut very thinly with a robust sheet of adhesive on the back.  Sticky Barc comes in two shades Cherry and White Birch, I have used the Cherry in my tutorial today the White Birch is a much lighter coloured wood, you could even mix them up on one project.  

For me the option to add wood to projects automatically speaks up for masculine cards and layouts,  I started my project today with one Sheet of Cherry Sticky Barc, cutting a 10x10cm piece for the first project, and then a series of strips for the second project.  I cut my Barc with a metal ruler and scalpel, but the Barc cuts really well on a paper trimmer as well.


This first card uses die cuts with the Sticky Barc.  You can cut Sticky Barc with all sorts of dies, I opted to use this star die today to demonstrate that even pointed cuts and thin shapes cut well.  It is best to consider the grain when cutting the sheet of wood, but the trusty X-Press It adhesive that backs the Barc keeps the wood stable.  You can cut from the face down into the Barc, or as I have done in this example, I cut from the adhesive back forward, this was primarily so that I could have the stars appear in the order that they do, as the die has the three stars on one piece of metal; but it works both ways.


Once I had cut the shapes out with the die, it was as simple as pushing out the stars and separating them, using the negative space left from the die cut as a feature that allows the background FabScraps Summer Lighthouse 2 paper to shine on through when the card is assembled.  Another great feature of Sticky Barc is that the backing sheet (to the adhesive) is applied in strips, this allows you to take pieces of the backing off at a time.  This is great as it takes the pressure off having to reveal whole sheets of the Barc at once when applying to your project.  I removed one piece of the backing paper, lined up from the bottom of the piece (where the adhesive is yet to be exposed) to get the position right, and then pressed the Barc into place.  Then it is a simple case of pulling back the remaining backing sheet to secure the rest of the Barc.


I coloured the cascading stars with a Copic Marker, the Barc takes Copic Ink really well, adding colour and allowing the texture of the wood to remain.  Stamping is also a great way to add interest and texture to the Barc, as the wood is natural in its form it does absorb the ink, so expect a little bit of blurring for your image, I think this adds a nice softness to the stamping, and once again allows the grain of the wood to remain a feature.


I added an image to the mix of stamped and cut Sticky Barc to finish off this little card.


The second card uses strips of the Sticky Barc.  The Barc is easily sectioned into strips, cut with the grain when you do this, I didn’t measure the strips just cut them at varying intervals across the piece of Barc.  I ran a Dark Brown Copic Marker along the edges of each of the strips before I started to build my background.  I have used long strips of Barc for this design, but you could also use shorter blocks, and fashion a wood wall, this would be a great way to use any “left over” Barc from other projects…. Even mixing up the two colours of Barc, or colouring the wood in different colours.


After building the background, I added an acetate tag which holds the name of the recipient of this card.  Using acetate allowed as much of the background as possible to be seen, and to remain a feature of this card.


Sticky Barc is a fabulous product, it cuts well, is easily coloured with ink, and altered with stamps.  Fashion backgrounds as I have done today, or build up flower and butterfly embellishments for your more feminine creations.

Here are the products I used in my project today:

X-Press It Stick Barc Cherry
X-Press It 6mm Double Sided Adhesive (on the card layers)
X-Press It Clear Gel (to secure the tag/button
FabScraps Summer Lighthouse 2 Paper


Until next time, I hope your creations are about to get "woody", enjoy!
Pin It