
Most of us know that
X-Press It specifically developed their Blending Card for use with Copic
Markers, it is bright white, robust (250gsm), silky smooth and a perfect
surface for holding and blending the wonderful copic ink. One of its defining characteristics is that
it carries the ink all the way through the paper and allows for everything from
top surface colouring through to full saturation. I thought a little encouragement book would
be a good way to show how delightful full colour saturation can be….
I started with a single
A4 sheet of Blending Card, and used a scoring board to help with the book fold
creases… here is a little link to a book fold diagram if you haven’t done one
of these before; I put an extra cut in my fold method to allow for
the thickness of X-Press It Blending Card, adjust to your preferences…

Once I had the book
folds in the order that I wanted them to finish in I secured the book in this
form with paper clips. Then I prepared
for inking by selecting three Blue|Green and one Yellow Various Inks.

From the top of the
clipped card stack I dribbled ink, starting with the darker Blue|Green from the
LHS, working down in depth of colour and across the top of the paper, finishing
with the Yellow on the RHS… I chose these colours to represent sky and
sunshine, but you could do this with any rainbow of colours. You could add enough ink to cover all the
Blending Card, or as I have done with varying amounts to form a dribbled look,
but still leave open space. It is a
little messy, just remember to keep your card upright and let gravity do the
work for you to get the ink to fall in between and down the pages…

I added some page definition
in the form of little borders, this was simply achieved by doodling with a
Copic Multi Liner (Black 0.3), the colour concentration provided by these
liners will never disappoint, black is sooo black, I love it!

To carry the colour
saturation theme, I punched a series of elements from X-Press It Blending Card
to build embellishments. Rather than cut
into another piece of A4 I reached for a couple of pieces of my ever present
X-Press It Blending Card Mini, they measure in at 9x15cm which is perfect for
image stamping, and also for die cutting from Blending Card. You can see my stack of little punched out card
in this image, and you will also note that I have stitched through most of the
pieces to add texture.

Because I used X-Press It
Blending Card to make the punchies, adding extra colour to them is an absolute
breeze, I just dribbled ink onto each one in the colour needed. You can achieve the same colour saturation
with a Copic Marker, it just takes a little longer, just keep colouring until
you have achieved total saturation through to the back of the paper, you can
still blend if you want to as well, but I opted for solid colours to keep with
the bright feel of my little book…. Lots of possibilities, just start and see
where your art takes you….

One other important note
is with regard to the thread that I used, it was just simple embroidery thread,
I wanted to show that you can:
- Use a black thread and the ink will not interrupt the definition between the black and the colour you chose to saturate the card with.
- Use coloured thread, and the ink may deepen the colour of the thread a little, but when using lighter shades not to a point of obvious difference.
- You could also opt to just use one colour of thread, like all white or cream, and it will take on the colour of the ink to add tone on tone definition.
Then it was a case of
adding the embellishments to the book with X-Press It Clear Gel Glue… I inserted some encouraging sentiments
as a starting point, and then filled space with the punched embellishments. You will note that my Multi Liner came out
again, and there are a few little sprinklings of rhinestones and the like to
finish off, but in general the only thing in this book is X-Press It Blending
Card and Copic Various Ink.

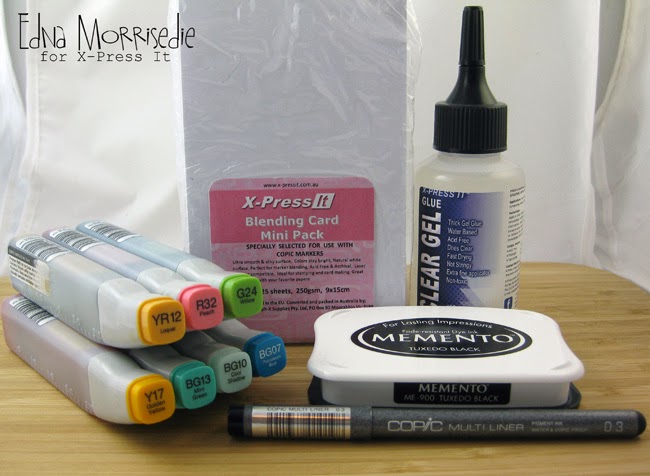
Here are the X-Press It Products
used in the tutorial today:
X-Press It Blending Card
X-Press It Clear Gel
Glue
Copic Sketch Markers
Copic Various Inks
Copic Multi Liner Black
0.3
Memento Tuxedo Black Ink

I hope you enjoyed this
tutorial and are encouraged to experiment with your X-Press It Blending Card….
I thought I wasn’t into bright, but I think I have just changed my own mind,
enjoy... EDNA!
Pin It
Hi Edna <orrisedie. It was great to "see" you today! I love your technique for the Various inks. I will definitely.share it with my stamper friends.
ReplyDeleteJan Marie
Flourishes.org
Thanks Jan Marie, lovely to hear from you, mwah!
Delete