Wednesday, December 31, 2014
X-Press It: Sticky Foil
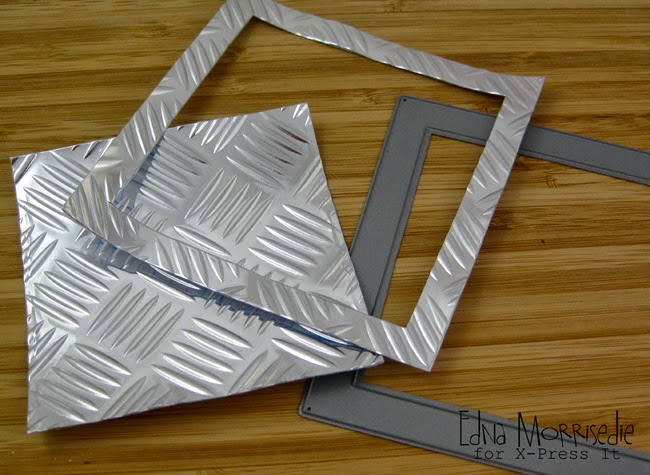
I was REALLY please to learn that the Tread Plate pattern does NOT dissipate when sticky foil is die cut, this is GOLD…. I am sure if you plate sandwich was firm it might go towards flattening, but my standard sandwich left the tread in place, making it easy to die cut elements from this fabby product:
Sticky Foil is true to name it has a grid like backing paper that separates easily from the foil, and is then easily pulled back to expose the adhesive and make it ready for adhering to the card I used today:
Another GOLD moment was when I took to the die cut frame with a Copic Marker, I thought I would have to airbrush the Sticky Foil to get the Copic to look as it should, but a few swipes with my trusty 100 Black Copic and the surface of the Sticky Foil was covered, and it left a really funky metallic look to it too… this just opened up a multitude of doors for this product for me!…. :
Sticky Foil brings a nice touch of clean cut masculine to your card projects, it cuts like butter in a die cutting machine, or on a guillotine, or with a scalpel, the backing peels back easily (SOOO important) and it sticks really well, making open window cards an easy task!
If you haven't tried Sticky Foil yet it is time to get it out of your stash and give it a whirl!!!
I look forward to using this with some different colour combos in the very near future...
Pin It
Wednesday, December 17, 2014
X-Press It Double Sided Tape Sheets
Fuss free and mess free.
Not really things you hear about much at this time of year.
But I have something to share with you that is fuss free, mess free
AND
super quick and easy!
Enter X-Press It Double Sided Tape Sheets.
This product takes all the mess out of fiddly craftiness!
I want to share with you a quick card and tag that I made using the trusty tape sheets.
What also makes this project even better is that I used scraps!
You know the strips of paper that you cut off your 12x12?
You know the little bits of pattern paper that you hold on to, just in case?
Yes those!
I pulled out a whole bunch and layered them onto
one side of the Double Sided Tape Sheet.
I even used the manufacturer strip from a piece of pattern paper
(because I love text).
Once I had filled the sheet I pulled off the backing
and adhered the strips to some cardstock.
I then used my electronic cutting machine and made some die cuts.
One I added to a tag, using some X-Press It Foam Tape.
Add a hole and a sentiment and… well it doesn’t get much easier than that!
I also used the negative, left from the die cut.
I back that with some dark pattern paper and added it with a doily to a card.
You could use the same idea and some of your favourite punches.
If you have a die cut machine you could have lots of fun
making allsorts of dies for all manner of occasions.
I hope this inspires you to use your scraps and get creative.
Happy Christmas from all of us here at X-Press It.
May your new year be a creative one.
Wednesday, December 3, 2014
X-Press It: Double Sided Tape
Step 5: Continue to pleat the fabric, moving into the inner circle once you have covered the outer circle:
Wednesday, November 19, 2014
Sticky Barc and it’s endless uses
Have you used Sticky Barc before?
I hadn’t and I was curious to know just what it could do.
So I gave it a test drive.
First step was to cut a piece to A4 size and run it through my printer.
It cut just like butter. I was afraid it might “shatter” but it didn’t.
I thought the printer ink might smudge. It didn’t.
Free Printable found HERE
I cut out one of the images and decided to make a journal page with it.
(You can read more about that on my blog).
I used one of the images and painted over it with some water colour paint.
I love the way the printer ink feathered out as it bled through the wood grain.
Now because the Sticky Barc is adhesive I thought it would make great deco tape.
I cut off a scrap and stuck it flat using some double sided tape.
Then I simply stamped a repeated pattern over the Sticky Barc.
Easy as that!
Another gift idea that was a great way to use up the leftovers was to stamp a tag shaped stamp onto the Sticky Barc.
I then cut out the shapes and they were ready to be used.
You could write on them, run them through the typewriter or printer, or add some alpha stickers.
Great for gift tags or labels on bottles (the adhesive backing makes it super simple for that!).
You could emboss some too or even use a die cut machine or electronic cutting machine to make other amazing die cut shapes.
Here is the journal page I made using the bird image that I printed onto the Sticky Barc.
Hope you give Sticky Barc a test run too. It’s fun medium to play with.
Have a creative week
Sharmaine.
Wednesday, November 5, 2014
X-Press It: Glitter Paint
Wednesday, August 20, 2014
Double Sided Bliss
Today's project uses two sizes of tape 3mm and 6mm across the front of a card. Of course I used double sided tape to adhere layers all the time, but thought it would be nice to see the tapes in action today for more display purposes…
And then onto the fun of confetti, made from scraps of card that tie into the colours of the washi tape above, with a simple whole punch:
It really is as simple as giving the confetti a good rub, and the tape adheres and holds all the tiny pieces firmly in place:
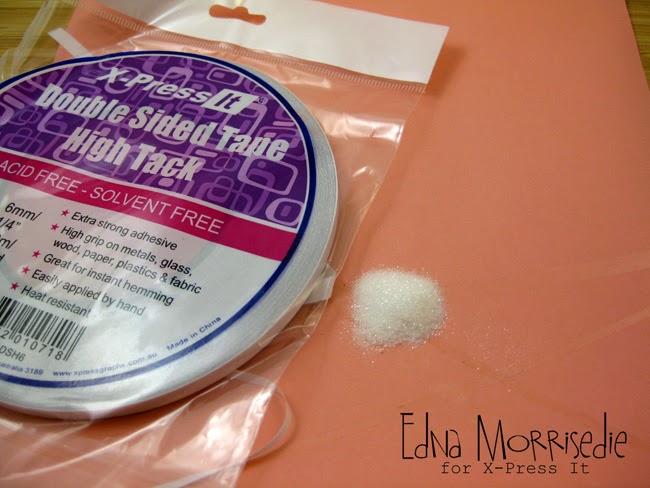
This technique is repeated with fine glitter on the 3mm strips of tape:
And a little word die cut coloured with a Copic Marker to match the card/washi colours:
And then it was about finishing off the card with a flower and leaves…
Pin It


