Wednesday, February 11, 2015

X-Press It TripleTac Glue - Transfer Medium - Canvas

Today I am going to walk you through the process of using X-Press It’s TripleTac Glue as a transfer medium.
I could have also called this blog post “turning bad into good”!
I will show you how to work through a process, even when things don’t go quite how you expect and not giving up on a creative thought.
Using TripleTac as a transfer medium is one of my favourite techniques to play with.
It is super easy.
All you need is a canvas, X-Press It TripleTac Glue and something to transfer. It could be a pattern paper print, a print from a magazine or a photo.

SharmaineKruijver_XPressIt_TripleTac1

Firstly the photo.
The photo is printed straight onto copy paper.
Did I mention this technique was easy?
It doesn’t matter if it’s inkjet or laser, although laser works better.
You will notice my photo is on the dark side.
I wasn’t sure how it was going to look once transferred so used the whole process as an experiment.

Once you’ve selected your canvas and printed off a photo to fit
cover the photo side of the paper with TripleTac.

SharmaineKruijver_XPressIt_TripleTac2

Then place this side of the paper down on to your canvas.

SharmaineKruijver_XPressIt_TripleTac3

Allow the glue to dry, you can use a heat gun or allow to dry naturally (which can take a few hours but best results are from waiting 24 hours).

Now the great thing about this technique is that you can use the transfer medium on all sorts of things.
Transfer on to wood, cardboard or even cardstock. Anything flat that won’t move when you follow the next part of the process.

Once the glue is dry, use a paint brush and apply some water

SharmaineKruijver_XPressIt_TripleTac4

Then working in small sections start rubbing back the layer of paper to reveal the photo below.

 SharmaineKruijver_XPressIt_TripleTac5

By working in small sections you will soon see where the paper still needs rubbing back.

SharmaineKruijver_XPressIt_TripleTac6

Be careful not to rub too hard or too far as you will start to remove the photo.
You will see this happened in small sections of my canvas. You will see that I made this “mistake” work to my advantage.
Once you have removed the paper membrane from the whole canvas give it a clean with a damp cloth (I like to use my hand that has been dampened with a little water).
Allow to dry. Then cover with another coat of TripleTac to seal the print, making sure the coat is flat or it will dry streaky (as it did on my canvas…more on that below)

SharmaineKruijver_XPressIt_TripleTac7

And that’s the whole process.
Told you it was easy!
You can now add some paint around the edge of your canvas to finish it off.
For my canvas I took it a little step further.

SharmaineKruijver_XPressIt_TripleTac8

I have painted some layers around my photo and then covered the “white space” with some text.
I used the glue streaks to my advantage by highlighting them to emphasis texture and dimension.

SharmaineKruijver_XPressIt_TripleTac9

The result

SharmaineKruijver_XPressIt_LoveCanvas

Hopefully this inspires you to give this technique a go.
Why not grab your bottle of TripleTac and experiment.
Have a creative week
Sharmaine

Pin It

Wednesday, January 28, 2015

X-Press It Stencil Sheets: White Card to Colourful Card

Today is the day that we share the wonders of X-Press It Stencil Sheets which are low tack vinyl sheets that can be used to build masks of your own choosing, it comes in single sheets, perfect to give this great product a go:

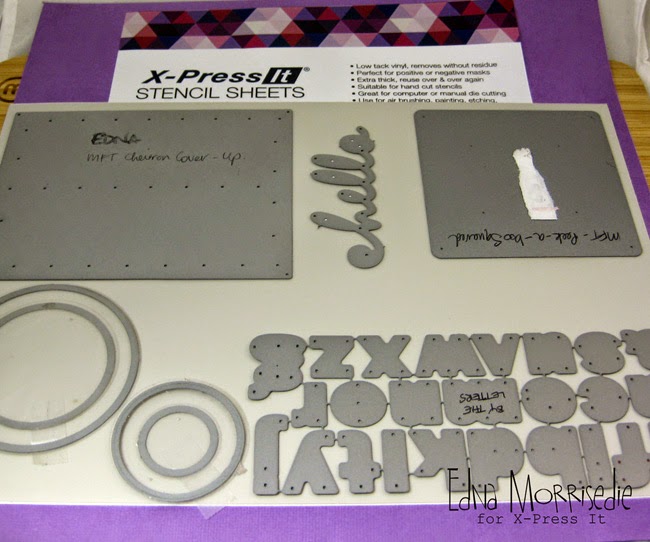
Hand cut negative and positive space masks or do what I have done in today's tutorial and put your abundance of die cuts to good use!  I have planned my dies out to cut in one pass, but you can cut as you go as well:


The absolute BEST thing about X-Press It Stencil Sheets is the low tack backing, that allows you to stick the stencil to your project and not worry about leakage when you are drenching with coloured sprays, or spray paint or the like… the tack provides a solid barrier to your card stock, and ensures a clean line, something that can't be achieved with plastic stencils, or a simple cardboard die cut, look at the great results with the chevron background die below.  The die cuts through the stencil sheet, and if you are careful with your sandwich width will save the backing sheet, otherwise you can store on a transparency sheet:

I have used the positive space for this project, but you could also use the chevron strips as well, place directly onto card, and a simple press connects the low tack backing to your project:

Mist up with a spray, and because it has good connection with the card you don't need to worry about puddling the spray:

Pat off excess, or dry gently with a heat tool:

Peel the mask back to reveal the stencilled design:

Continue to build colour with different masks, these next masks are circles made from stacked circle dies, very simple and easy to use time and time again:

The stencil sheet is flexible enough to overlap and still provide good connection with the base card of your project:

Spray a contrasting colour, this time leaving different consistency of colour across the project, so that you can see puddles of red/pink, and also still see the yellow chevron poking through:

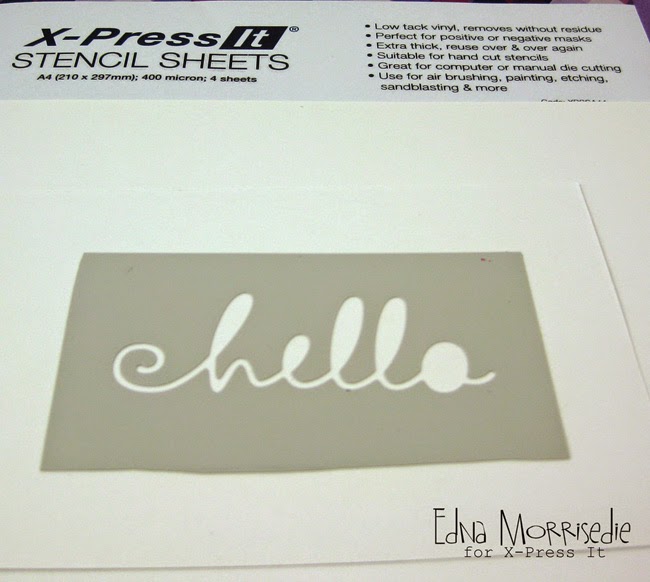
Don't be afraid to cut fine dies and put them to use, in this example I have used the negative space from a hello die to build a label, make sure you leave a generous border around words that you intend on using the negative space… and keep the positive space hello for future use:

Straight onto a piece of scrap card with plenty of room for the whole stencil:

Spray, and then cut out with another stencil to build a little sentiment banner:

Stencils and simple white card, can turn into a good splash of colour… 


X-Press It Stencil Sheets will work with sprays like I have used today, but also any other wet or dry medium… try your copics, airbrushed copics, liner pens, crayons, watercolours, the list is endless!


I hope you have enjoyed this little tutorial on using X-Press It Stencil Sheets with your die cuts… it's time to get colourful!


Pin It

Wednesday, January 14, 2015

Clear Gel Glue (and other ways you can use it)

Hi readers,
I’m on holidays and wishing I had packed more scrappy supplies than I did!
So this blog post is just a short insight
into some ideas of what you can use
X-Press It’s Clear Gel Glue for, apart from the obvious… gluing!!
The first thing I thought to try out was using the Clear Gel Glue
as a paste to run over a stencil.

IMG_5758

Placing my card under this FabScraps stencil
I smoothed some glue over the stencil with a palette knife.

IMG_5762

I then gently removed the stencil.

IMG_5763

Once dried the glue gives the card a two tone effect
and is a great background for a card or a scrap page.

The second idea was to use the glue to create an embellishment.
I was without my circle punch,
as you could use this idea on some pattern paper,
so I used these FabScraps stickers instead.

IMG_5769

I added a large coating of glue to the circle design

IMG_5773

Once dry it became like a clear dot and you could see the pattern underneath.

IMG_5772

Hope this quick post has inspired you to see X-Press It’s Clear Glue Gel
in a totally different light.
You can use a small amount to give a gloss finish to your work,
or a thicker coat to create something different and amazing.
Happy creating
Sharmaine

Pin It

Friday, January 9, 2015

X-Press It Has A Fresh New Look


We are excited to announce that commencing in January 2015 the X-Press It range will have a fresh new look! Your favourite, tried and tested products will remain exactly the same, but with brand new packaging. The new colourful and contemporary designs will be in your local store soon!

Visit our website to view our new look and be sure to follow us on facebook and Instagram.


Pin It

Wednesday, December 31, 2014

X-Press It: Sticky Foil

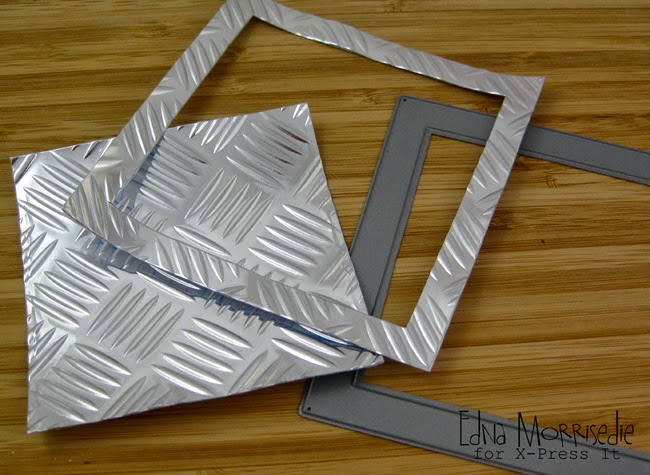
There is this relatively newish thing in the land of X-Press it called Sticky Foil, it is kind of soooo nice it is a little painful to cut into it, but that is what we buy it for so I got my MASCULINE on with this tutorial… given the first thing that comes to mind when I see the pattern (which is called Tread Plate) on the Sticky Foil is the pressed metal found in blokes workshops and tray backs and such…. it is shiny and a little hard to photograph but here are a couple of starting shots:


I was REALLY please to learn that the Tread Plate pattern does NOT dissipate when sticky foil is die cut, this is GOLD…. I am sure if you plate sandwich was firm it might go towards flattening, but my standard sandwich left the tread in place, making it easy to die cut elements from this fabby product:


Sticky Foil is true to name it has a grid like backing paper that separates easily from the foil, and is then easily pulled back to expose the adhesive and make it ready for adhering to the card I used today:


Another GOLD moment was when I took to the die cut frame with a Copic Marker, I thought I would have to airbrush the Sticky Foil to get the Copic to look as it should, but a few swipes with my trusty 100 Black Copic and the surface of the Sticky Foil was covered, and it left a really funky metallic look to it too… this just opened up a multitude of doors for this product for me!…. :


Sticky Foil brings a nice touch of clean cut masculine to your card projects, it cuts like butter in a die cutting machine, or on a guillotine, or with a scalpel, the backing peels back easily (SOOO important) and it sticks really well, making open window cards an easy task!


If you haven't tried Sticky Foil yet it is time to get it out of your stash and give it a whirl!!!

I look forward to using this with some different colour combos in the very near future...


Pin It

Wednesday, December 17, 2014

X-Press It Double Sided Tape Sheets

Fuss free and mess free.
Not really things you hear about much at this time of year.
But I have something to share with you that is fuss free, mess free
AND
super quick and easy!

Enter X-Press It Double Sided Tape Sheets.
This product takes all the mess out of fiddly craftiness!
I want to share with you a quick card and tag that I made using the trusty tape sheets.
What also makes this project even better is that I used scraps!
You know the strips of paper that you cut off your 12x12?
You know the little bits of pattern paper that you hold on to, just in case?
Yes those!

SharmaineKruijver-XPressIt_DoubleSidedTapeSheet

I pulled out a whole bunch and layered them onto
one side of the Double Sided Tape Sheet.
I even used the manufacturer strip from a piece of pattern paper
(because I love text).

SharmaineKruijver_XPressIt_DoubleSidedTapeSheetScraps

Once I had filled the sheet I pulled off the backing
and adhered the strips to some cardstock.
I then used my electronic cutting machine and made some die cuts.
One I added to a tag, using some X-Press It Foam Tape.

SharmaineKruijver_XPressIt_FoamTape

Add a hole and a sentiment and… well it doesn’t get much easier than that!

SharmianeKruijver_XPressIt_DeerTag

I also used the negative, left from the die cut.
I back that with some dark pattern paper and added it with a doily to a card.

SharmianeKruijver_XPressIt_DeerCard

You could use the same idea and some of your favourite punches.
If you have a die cut machine you could have lots of fun
making allsorts of dies for all manner of occasions.
I hope this inspires you to use your scraps and get creative.
Happy Christmas from all of us here at X-Press It.
May your new year be a creative one.

Sharmaine

Pin It

Wednesday, December 3, 2014

X-Press It: Double Sided Tape

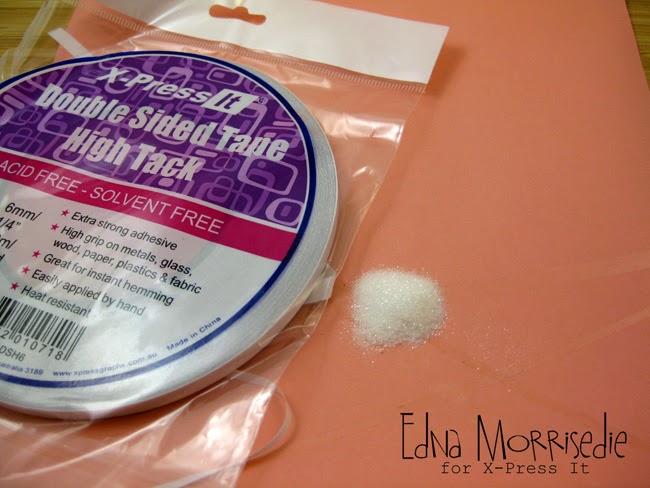
Today's tutorial focusses on the use of a basic supply to add wow to your gift wrapping.  Gift wrapping comes in many forms and today I am wrapping a present for my newest second cousin, born yesterday, a little fat beauty she is too… so a floral inspired gift wrapping theme was in order.  I started by cutting my coral wrapping paper to size, and criss-crossing 3mm and 6mm double sided tape across the front.  I have used High Tack tape for durability, but you can also use standard tape for this project:


Once the tape is in place, expose the tape and add a little pile of glitter to the centre, rubbing out across the different strips of tape.  A good thing to remember with glitter is that the harder you rub the better connection it has with the tape, and the more it will SHINE:


Set the paper aside and work on building some flowers.  Today I have used simple white cheesecloth , two 15cm lengths and one 30cm length, but you can make these in any size you like.  This little set of pictures shows the method:
Step 1: place a strip of 6mm tape along one edge of fabric:

Step 2: Remove the backing and fold the fabric in half:

Step 3: Run another pice of tape along the rough seam:

Step 4: Remove the backing and pleat the fabric to the outer edge of a circle of card:

Step 5: Continue to pleat the fabric, moving into the inner circle once you have covered the outer circle:

Repeat this for the 3 lengths of fabric to make a trio of flowers.

Next it is time to wrap the present…. square off the wrapping paper so that the criss-cross of glitter strips sits nicely on the front of the package.  I used double sided tape on the edges of the wrapping paper to so that there are clean closures, and no visible tape:

Place the flowers across the top of the glitter strips, adding die cut leaves, and loopy bows for extra flair… and don't forget to finish off the flower centres with extra embellishments, I have used buttons this time, that co-ordinate with the wrapping paper… each and every element is adhered with double sided tape:


These little flowers are super quick, allow you to use up strips of basic fabric, and bring it all together with simple double sided tape… paper, fabric and glitter all with one basic, everyone has it, product….got to love that!!


Here are the X-Press It Products I used today:
3mm Double Sided Tape High Tack
6mm Double Sided Tape High Tack


So the next time you have a wrapping project, why not have a go at building 3D embellishments, they come together really easy with your trusty X-Press It Double Sided Tapes!
Pin It