Welcome back X-Press IT Fans, and I hope you had a fabulous Christmas and New Year.
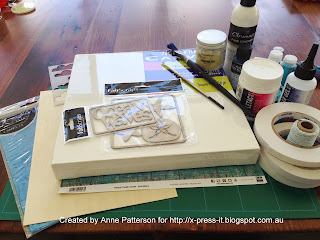
Anne here to share with you a canvas I have created using the FabScraps Beach Comber Collection and a HUGE Variety of X-Press IT Products.
Products Used:
Fab Scraps Beach Comber Paper
Fab Scraps Beach Comber Chipboard
Adhesives
X-Press IT Sticky Barc
Firstly I did some prep work for the canvas, by giving it a coat of white paint and added some blue flecks into it.
I then set the canvas aside to dry and then painted my Ocean Waves Chipboard.
Once the chipboard was dry, I then used some X-Press IT Clear Glue to coat the top, which creates an awesome clear gloss accent when dry.
Once the canvas is dry, I took some Beach Combers Patterned Paper, and cut it down to be about 7" wide, and then tore it into four pieces. I have then used X-Press IT Triple Tac to adhere it to the canvas, in layers, with a layer of crumpled Cellophane between.
Then, using the Triple Tac, I have used a cloud template, and put the triple Tac onto the template to create two cloud shapes and then sprinkled with Shaved Ice. the Triple Tac is and excellent adhesive for applying these type of products.
I have then used some of the X-Press IT Sticky Bark, which is so easy to adhere to chipboard elements. Just peel back the adhesive, then place your chipboard face down. You then use a craft knife to cut around the outside of the chipboard element.
I love creating layers, so the next step was to start using some X-Press IT Foam Tape.
Using it just gives a lift to some elements on your page.
If you want to layer, so I wanted my picture to be on the same level as the lifted element, I made sure that I worked out where to put my Foam Tape before adhering it.
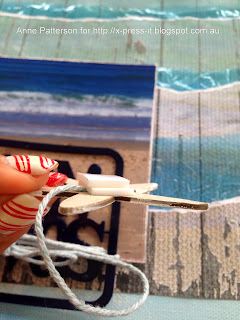
Ever wondered how to make string stay in the right place. Well I discovered the X-Press It Glue pen is THE solution. Just draw where you want the string to adhere to then press the string into position.
Need EXTRA lift, I am known to double up my foam tape.
The X-Press IT Gel pen is also the perfect solution for adding little details of glitter.
And don't forget it is the PERFECT tool for gluing on your sequins. Just draw a dot, where you want your sequin to go, then drop the sequin into position.
After adding a couple of other embellishments, and doing some doodling, here is the final canvas.
Thanks for Looking


I love this canvas. Thanks for the directions on how you made it too. Now where did you photograph it? It looks like in a pool area someplace.
ReplyDeleteAnd I love your stripped nail, too. How do you keep them so pretty while stamping?
Great job with all the XP delights... I love the paper cello combo, adds great interest and picks up the shimmer from the ice... will have to try my glue marker for string, great tute!
ReplyDelete