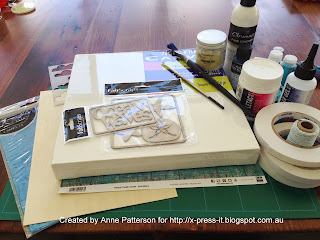
For this my first X-Press It Post for the year I had the very versatile FabScraps Birdcage Album to play around with along with a selection of fabulous floral papers and bird themed chipboard. I am not much of a photo keeper, so opted turn this little album into a group card, something I am regularly asked to produce when work colleagues celebrate special occasions, large store bought cards are rather drab, and it is always nice to present group messages over multiple layers, so thought this a perfect use for this album as it has many pages, of all different shapes, that very cleverly overlap one another. Here is what I started with today:
I have been know to take my Copic Ink to the covers of mini albums but this time I got to try out Free Flow and Liquid Concentrate paints, the beauty of these is that you use very little and can turn the paint into watercolour consistency without loosing any vibrancy of colour. I mixed equal portions of Pthalo Green and Violet to colour match the chipboard with the papers I chose to use today, using a piece of acetate as my palette, I like a clear palette as you get a good idea of the actual colour as it is mixed.
I alternated between watercolour washed pages and paper covered pages adhering the paper with X-Press It TripleTac to ensure a strong and even bond.
Many of the album pages can now be written on directly as desired, however, I made a couple of little book inserts for interest and to maximise writing space these came together easily with the paper scraps left over from covering the pages, using a plain selection for the writing space and trimming the stepped edges with the co-ordinating papers.
The Die Cut Words are covered with a thick silver medium and then adhered to various pages with X-Press It Clear Gel Glue for strong bond.
Now that the pages are all covered it is time to focus on the front cover, I painted a large feather in co-ordinating silver and then used different strengths of the paint, watercolour style once again, to colour 3 white flowers in different strengths of colour. This is easily achieve by starting with the darker colour and then diluting the water to step down to the next lighter shade, and so on...
You can see the three varying shades on the cover, all made from this one little pot of paint and water, silver highlights across the cover and the flower centres tie all of the elements together.
See how the different shaped pages cross over one another on the inside of the album, I like this feature it allows the next page to be previewed whilst enjoying what comes before it.
The back cover is one piece and flat, so this helps to keep the different layers steady and add a consistency to how this sits once the D rings are attached at the four side points.
Here are the X-Press Graph-X Products I used in my project today:
Die Cut Birdcage Album
FabScraps Papers:
Lilac Delight
Lilac Delight 2
Butterfly Pink
FabScraps Die Cut Peacock Feather
FabScraps Die Cut Butterflies
FabScraps Die Cut Words:
Moments
Dreams & Wishes
Dance Love Sing
X-Press It Clear Gel Glue
X-Press It TripleTac
Chromacryl Fluid Concentrate: Violet
Atelier Free Flow: Pthalo Green
I hope this inspires you to think about group cards in a new context, such is the versatility of these little FabScraps Albums, go ahead impress your colleagues and friends with one of these!
Until next time,


