Wednesday, May 22, 2013
'Beary Cute' Canvas..
Wednesday, May 8, 2013
Rock & Roll Clock
Hi everyone and welcome to another X-Press It blog post.
Today I’m using X-Press It Adhesives with some of the brand new FabScraps products.
I was given the new Rock & Roll clock to play with.
I wanted to use it for something a little different so the first thing I did was spray the clock face with some mist and paint the “8”, which was the number I wanted to highlight on my birthday themed page, with paint and glitter.
I then cut up some strips of FabScraps papers.
And layered them on the clock, as a backing for my photo.
I then cut up the hands from the Rock & Roll clock.
I painted them and later gave them a coat of watered down Liquid Pearls (for a glossy finish).
I also used some liquid pearls to outline the FabScraps Filigree Butterflies.
It was simple easy to do and it was a nice way to add another dash of colour.
I then added some FabScraps Jelly Brads,
Some gorgeous FabScraps pearls
and added some more blue with these painted FabScraps chipboard Feet.
And the end result…
”Flamingo Cake” a birthday layout.
Products used in this project:
X-Press It Clear Gel Glue
X-Press It Glue Marker
X-Press It 6mm Double Sided Tape
X-Press It 6mm High Tack Foam Mounting Tape
FabScraps Rock & Roll Clock
FabScraps Chipboard Feet
FabScraps Shabby Chic Stone Flower paper
FabScraps Timeless Travel Filigree paper
FabScraps Victoria’s Ballet Dress paper
FabScraps Heritage Pink Floral paper
FabScraps Victoria’s Shoes paper
FabScraps Flat Back Pearls
FabScraps Jelly Brads
FabScraps Filigree Butterflies
I encourage you to look at scrap products and see if you can use them in a different way.
Thanks for visiting with X-Press It today and hope you are inspired to create.
Sharmaine
Wednesday, April 24, 2013
A Mother Needs Pins & Needles
- X-Press It TripleTac
- X-Press It Clear Gel Glue.
- FabScraps Papers: Chocolate, Vanilla
- FabScraps Sewing Machine Album (including the big cotton reel and scissors on the front)
- FabScraps Sewing Set: 2 Needles, 2 Cotton Reels, Scissors
- FabScraps Pins'n Needle word.
Wednesday, April 10, 2013
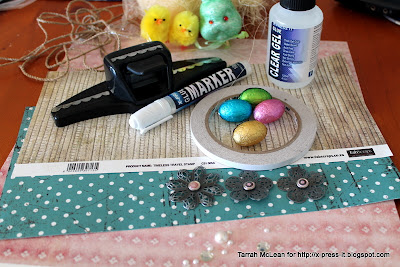
Easter Cup Decorations.....
Start off by trimming the patterned paper to approximately 6cm x 30cm using your scallop punch down one of the long sides. Score with your scorer and ruler each scallop so that once you are finished you can concertine each one. Repeat for your desired number...
I n my case, I made three...you should end up with pieces looking like this once you have scored and folded/concertined your pieces.
From your Cuttlebug or Big Shot cut a scallop circle and a slightly smaller plain circle from all the different patterned papers and adhere the smaller circle to the scallop circle.....
Take your long pieces and bring around to meet each other so you have a circular 'cup' shape. The X-Press It Glue Marker Pen was perfect for this bit as it was a small piece to adhere together.
I found for this next bit that the X-Press It Double Sided High Tack Tape worked the best as you need a strong hold for the folds to stay in place on the bottom circle pieces. Adhere the 'cup' pieces using the High Tack Tape to the small circle bottoms making sure that your scallops are at the top...
Then you can go ahead and decorate how you wish, I added some wood fibres inside my little cups and added some coloured Easter eggs and some cute little chickens!!!
X-Press It Adhesives and the gorgeous FabScraps paper ranges...
Thanks again so much joining me today on the X-Press It blog, I hope I have inspired you to create with your X-Press It and FabScraps products.....be sure to check back again soon for more inspiration from the X-Press It and FabScraps Design Team
Take care....
Tarrah x
Wednesday, March 27, 2013
Imagine and Play Layout
Today I want to share a layout that I made using FabScraps and X-press It products
Because my page was going to have a garden/outdoors feel to it, I pulled out some FabScraps papers (from the Rustic range) and some other Fabscraps goodies (chipboard, buttons, flower and metal butterfly)
I painted the FabScraps “imagine” chipboard in blue and the butterfly, to the side of the word I painted in yellow.
I then added a punched vellum butterfly, which I had coated in some glitter, to the top.
I lifted the vellum wings to give some movement.
I added a cluster to the side of the title.
I also painted the flower buttons with some yellow.
Another thing I altered was this gorgeous metal butterfly.
He was given a work over with my favourite blue paint.
I fussy cut this “winged creature” from one of the pattern papers
I “hid” some FabScraps chipboard lizards under the flower, just like lizards hide away under rocks in the garden.
and there you have it.
All the parts need for my outdoorsy page
a page documenting 2 of our girls having fun outside.
Using their imagination while playing.
I love that!!
And I love that I could use my imagination, with the help of FabScraps and X-Press It, to create this page!!
Products used for this page:
X-Press It Clear Gel Glue
X-Press It 6mm Double Sided Tape
X-Press It Glue Marker Pen
FabScraps “Rustic” Pattern Papers
FabScraps Metal Butterfly
FabScraps Chipboard “Imagine”
FabScraps Chipboard Lizards
FabScraps Wooden Buttons
FabScraps flower
Wednesday, March 13, 2013
Faux Washi Tape
- X-Press It 6mm Double Sided Tape
- X-Press It Clear Gel Glue.
- FabScraps Papers: Pink Flamingos, Pink Flamingos 2
- FabScraps Daisy (the small and medium from the 3 daisy set)
- FabScraps Brass Embellishment (Padlock) and Pearl (coloured with Copic)


