Showing posts with label Design Team. Show all posts

Wednesday, September 2, 2015

X-Press It Sticky Foil

  • Sticky foil tread plate is a durable foil with an industrial looking tread plate design embossed into the surface.
  • The Sticky Foil is a self adhesive foil making it easy to cut and stick.
  • Sticky foil can be cut with scissors, knife of die cutter.
  • Available in A3 or A4 sizes.

SharmaineKruijver_X-PressIt_StickyFoil_1

Creating a storage unit (or unique gift packaging) for Dad is easy with X-Press It's Sticky Foil.
Cut a recycled cardboard box into the shape you require
Then cover the sides with sheets of Sticky Foil.

SharmaineKruijver_X-PressIt_StickyFoil_2

Make sure you cover the edges with tape as the edges can be sharp.

SharmaineKruijver_X-PressIt_StickyFoil_5

Great gift idea for storage.

SharmaineKruijver_X-PressIt_StickyFoil_3

Or a great packaging idea for your Father's Day gift.

SharmaineKruijver_X-PressIt_StickyFoil_4

Pin It

Wednesday, June 10, 2015

X-Press It Double Sided Tape

 
X-Press It Double Sided Tape
  • Acid Free & solvent free
  • Easy to tear & apply by hand
  • Easy to peel liner
  • Heat resistant
  • Ideal for scrapbooking & papercraft
  • Great for embossing
  • Perfect to use on photos
  • Suits a wide range of surfaces
 X-Press It's Double sided tape is a great adhesive for quick, no-mess crafting.
 
 
Use it to adhere photos or paper.
 

Heat embossing becomes stress free, add a border with the 3mm double sided tape and some embossing powder.
 
 
Adding ribbon is quick and easy, run some 6mm double sided tape on the back of your ribbon.
You can then add a gathered look to your ribbon by simply adding some tucks, which all stay in place with the double sided tape.


Adding brads and embellishments becomes a breeze. Cut off the back of a brad and replace with a small section of double sided tape. No more cutting through your paper!


Pin It

Wednesday, April 22, 2015

Paper fun with adhesive sheets

Hi everyone

Sharmaine here with 2 videos of some quick and easy paper craft ideas.
In the first I will share how to make some mini bunting
And in the second, how to use your stash and make some stickers.
All using X-Press It double sided adhesive sheets.

But first here are two ways that I used the mini bunting, dressing up some gift ideas.

BuntingJar

IMG_7352a


Hoping your week is craft filled

Sharmaine

Pin It

Wednesday, March 25, 2015

Sweet 16 Card using X-Press It Adhesive Sheets

Hello crafters.
Sharmaine here with a really fun way to make a sweet 16 card.

SharmaineKruijver_XPressIt_SprinklesCard

All you need is some cardstock, X-Press It Double Sided Adhesive Sheets and some 100’s & 1000’s

SharmaineKruijver_XPressIt_SprinklesCard1

Cut two pieces of card to equal lengths (whatever your ideal card size may be)
Then take one of the cards and cut out the design you require.
I made mine nice and simple and cut it with an electronic cutting machine.

SharmaineKruijver_XPressIt_SprinklesCard2

Next step is to cut a length of adhesive sheet
I cut a piece the same length as my card
Making it easy to adhere the two pieces of card
Peel off the backing sheet and adhere to one piece of card.

SharmaineKruijver_XPressIt_SprinklesCard3


Then peel off the other backing sheet and stick the two pieces of cards together.

SharmaineKruijver_XPressIt_SprinklesCard4

You will notice the “cut out section” now has the adhesive sheet peeking through.
Now comes the messy part!

SharmaineKruijver_XPressIt_SprinklesCard5

Cover the whole sticky section with 100’s & 1000’s.
You may need to push them down from time to time
Until the whole section is covered.

SharmaineKruijver_XPressIt_SprinklesCard6

But once the sprinkles are stuck onto the tape they won’t move far.

SharmaineKruijver_XPressIt_SprinklesCard7

If you weren’t up for sprinkles you could coat the section with microbeads or sand.
You could also create tags, embellishments or even coat die cuts using the same technique.
X-Press It Adhesive Sheets are super strong and sticky.

Hope this has inspired you to create.

Sharmaine

Pin It

Wednesday, February 11, 2015

X-Press It TripleTac Glue - Transfer Medium - Canvas

Today I am going to walk you through the process of using X-Press It’s TripleTac Glue as a transfer medium.
I could have also called this blog post “turning bad into good”!
I will show you how to work through a process, even when things don’t go quite how you expect and not giving up on a creative thought.
Using TripleTac as a transfer medium is one of my favourite techniques to play with.
It is super easy.
All you need is a canvas, X-Press It TripleTac Glue and something to transfer. It could be a pattern paper print, a print from a magazine or a photo.

SharmaineKruijver_XPressIt_TripleTac1

Firstly the photo.
The photo is printed straight onto copy paper.
Did I mention this technique was easy?
It doesn’t matter if it’s inkjet or laser, although laser works better.
You will notice my photo is on the dark side.
I wasn’t sure how it was going to look once transferred so used the whole process as an experiment.

Once you’ve selected your canvas and printed off a photo to fit
cover the photo side of the paper with TripleTac.

SharmaineKruijver_XPressIt_TripleTac2

Then place this side of the paper down on to your canvas.
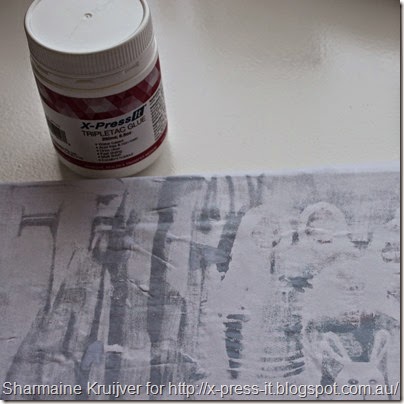
SharmaineKruijver_XPressIt_TripleTac3

Allow the glue to dry, you can use a heat gun or allow to dry naturally (which can take a few hours but best results are from waiting 24 hours).

Now the great thing about this technique is that you can use the transfer medium on all sorts of things.
Transfer on to wood, cardboard or even cardstock. Anything flat that won’t move when you follow the next part of the process.

Once the glue is dry, use a paint brush and apply some water
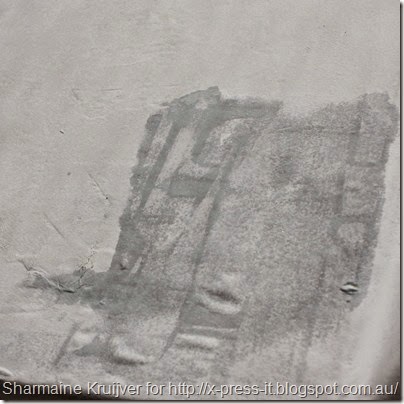
SharmaineKruijver_XPressIt_TripleTac4

Then working in small sections start rubbing back the layer of paper to reveal the photo below.

 SharmaineKruijver_XPressIt_TripleTac5

By working in small sections you will soon see where the paper still needs rubbing back.

SharmaineKruijver_XPressIt_TripleTac6

Be careful not to rub too hard or too far as you will start to remove the photo.
You will see this happened in small sections of my canvas. You will see that I made this “mistake” work to my advantage.
Once you have removed the paper membrane from the whole canvas give it a clean with a damp cloth (I like to use my hand that has been dampened with a little water).
Allow to dry. Then cover with another coat of TripleTac to seal the print, making sure the coat is flat or it will dry streaky (as it did on my canvas…more on that below)

SharmaineKruijver_XPressIt_TripleTac7

And that’s the whole process.
Told you it was easy!
You can now add some paint around the edge of your canvas to finish it off.
For my canvas I took it a little step further.

SharmaineKruijver_XPressIt_TripleTac8

I have painted some layers around my photo and then covered the “white space” with some text.
I used the glue streaks to my advantage by highlighting them to emphasis texture and dimension.

SharmaineKruijver_XPressIt_TripleTac9

The result

SharmaineKruijver_XPressIt_LoveCanvas

Hopefully this inspires you to give this technique a go.
Why not grab your bottle of TripleTac and experiment.
Have a creative week
Sharmaine

Pin It

Wednesday, January 14, 2015

Clear Gel Glue (and other ways you can use it)

Hi readers,
I’m on holidays and wishing I had packed more scrappy supplies than I did!
So this blog post is just a short insight
into some ideas of what you can use
X-Press It’s Clear Gel Glue for, apart from the obvious… gluing!!
The first thing I thought to try out was using the Clear Gel Glue
as a paste to run over a stencil.

IMG_5758

Placing my card under this FabScraps stencil
I smoothed some glue over the stencil with a palette knife.

IMG_5762

I then gently removed the stencil.

IMG_5763

Once dried the glue gives the card a two tone effect
and is a great background for a card or a scrap page.

The second idea was to use the glue to create an embellishment.
I was without my circle punch,
as you could use this idea on some pattern paper,
so I used these FabScraps stickers instead.

IMG_5769

I added a large coating of glue to the circle design

IMG_5773

Once dry it became like a clear dot and you could see the pattern underneath.

IMG_5772

Hope this quick post has inspired you to see X-Press It’s Clear Glue Gel
in a totally different light.
You can use a small amount to give a gloss finish to your work,
or a thicker coat to create something different and amazing.
Happy creating
Sharmaine

Pin It

Wednesday, December 17, 2014

X-Press It Double Sided Tape Sheets

Fuss free and mess free.
Not really things you hear about much at this time of year.
But I have something to share with you that is fuss free, mess free
AND
super quick and easy!

Enter X-Press It Double Sided Tape Sheets.
This product takes all the mess out of fiddly craftiness!
I want to share with you a quick card and tag that I made using the trusty tape sheets.
What also makes this project even better is that I used scraps!
You know the strips of paper that you cut off your 12x12?
You know the little bits of pattern paper that you hold on to, just in case?
Yes those!

SharmaineKruijver-XPressIt_DoubleSidedTapeSheet

I pulled out a whole bunch and layered them onto
one side of the Double Sided Tape Sheet.
I even used the manufacturer strip from a piece of pattern paper
(because I love text).

SharmaineKruijver_XPressIt_DoubleSidedTapeSheetScraps

Once I had filled the sheet I pulled off the backing
and adhered the strips to some cardstock.
I then used my electronic cutting machine and made some die cuts.
One I added to a tag, using some X-Press It Foam Tape.

SharmaineKruijver_XPressIt_FoamTape

Add a hole and a sentiment and… well it doesn’t get much easier than that!

SharmianeKruijver_XPressIt_DeerTag

I also used the negative, left from the die cut.
I back that with some dark pattern paper and added it with a doily to a card.

SharmianeKruijver_XPressIt_DeerCard

You could use the same idea and some of your favourite punches.
If you have a die cut machine you could have lots of fun
making allsorts of dies for all manner of occasions.
I hope this inspires you to use your scraps and get creative.
Happy Christmas from all of us here at X-Press It.
May your new year be a creative one.

Sharmaine

Pin It

Wednesday, November 19, 2014

Sticky Barc and it’s endless uses

Have you used Sticky Barc before?
I hadn’t and I was curious to know just what it could do.
So I gave it a test drive.
First step was to cut a piece to A4 size and run it through my printer.
It cut just like butter. I was afraid it might “shatter” but it didn’t.
I thought the printer ink might smudge. It didn’t.

IMG_5278
Free Printable found
HERE

I cut out one of the images and decided to make a journal page with it.
(You can read more about that on my blog).

IMG_5279

I used one of the images and painted over it with some water colour paint.
I love the way the printer ink feathered out as it bled through the wood grain.

IMG_5284

Now because the Sticky Barc is adhesive I thought it would make great deco tape.
I cut off a scrap and stuck it flat using some double sided tape.

IMG_5302

Then I simply stamped a repeated pattern over the Sticky Barc.

IMG_5303

Easy as that!
Another gift idea that was a great way to use up the leftovers was to stamp a tag shaped stamp onto the Sticky Barc.

IMG_5304

I then cut out the shapes and they were ready to be used.
You could write on them, run them through the typewriter or printer, or add some alpha stickers.

IMG_5307

Great for gift tags or labels on bottles (the adhesive backing makes it super simple for that!).

IMG_5314

You could emboss some too or even use a die cut machine or electronic cutting machine to make other amazing die cut shapes.
Here is the journal page I made using the bird image that I printed onto the Sticky Barc.

SharmaineKruijver_XPressIt_ArtJournal

Hope you give Sticky Barc a test run too. It’s fun medium to play with.
Have a creative week
Sharmaine.

Pin It