Wednesday, January 29, 2014

Group Card FabScraps Style--Birdcage Album

For this my first X-Press It Post for the year I had the very versatile FabScraps Birdcage Album to play around with along with a selection of fabulous floral papers and bird themed chipboard.  I am not much of a photo keeper, so opted turn this little album into a group card, something I am regularly asked to produce when work colleagues celebrate special occasions, large store bought cards are rather drab, and it is always nice to present group messages over multiple layers, so thought this a perfect use for this album as it has many pages, of all different shapes, that very cleverly overlap one another.  Here is what I started with today:


I have been know to take my Copic Ink to the covers of mini albums but this time I got to try out Free Flow and Liquid Concentrate paints, the beauty of these is that you use very little and can turn the paint into watercolour consistency without loosing any vibrancy of colour.  I mixed equal portions of Pthalo Green and Violet to colour match the chipboard with the papers I chose to use today, using a piece of acetate as my palette, I like a clear palette as you get a good idea of the actual colour as it is mixed. 


I alternated between watercolour washed pages and paper covered pages adhering the paper with X-Press It TripleTac to ensure a strong and even bond.


Many of the album pages can now be written on directly as desired, however, I made a couple of little book inserts for interest and to maximise writing space these came together easily with the paper scraps left over from covering the pages, using a plain selection for the writing space and trimming the stepped edges with the co-ordinating papers.


 The Die Cut Words are covered with a thick silver medium and then adhered to various pages with X-Press It Clear Gel Glue for strong bond.


Now that the pages are all covered it is time to focus on the front cover, I painted a large feather in co-ordinating silver and then used different strengths of the paint, watercolour style once again, to colour 3 white flowers in different strengths of colour.  This is easily achieve by starting with the darker colour and then diluting the water to step down to the next lighter shade, and so on...


You can see the three varying shades on the cover, all made from this one little pot of paint and water, silver highlights across the cover and the flower centres tie all of the elements together.


See how the different shaped pages cross over one another on the inside of the album, I like this feature it allows the next page to be previewed whilst enjoying what comes before it.


The back cover is one piece and flat, so this helps to keep the different layers steady and add a consistency to how this sits once the D rings are attached at the four side points.


Here are the X-Press Graph-X Products I used in my project today:
Die Cut Birdcage Album
FabScraps Papers:
Lilac Delight
Lilac Delight 2
Butterfly Pink
FabScraps Die Cut Peacock Feather
FabScraps Die Cut Butterflies
FabScraps Die Cut Words:
Moments
Dreams & Wishes
Dance Love Sing
X-Press It Clear Gel Glue
X-Press It TripleTac
Chromacryl Fluid Concentrate: Violet
Atelier Free Flow: Pthalo Green


I hope this inspires you to think about group cards in a new context, such is the versatility of these little FabScraps Albums, go ahead impress your colleagues and friends with one of these!

Until next time, 

Pin It

Wednesday, January 15, 2014

Ocean Waves Canvas

Welcome back X-Press IT Fans, and I hope you had a fabulous Christmas and New Year.

Anne here to share with you a canvas I have created using the FabScraps Beach Comber Collection and a HUGE Variety of X-Press IT Products.

Beach Comber Canvas with X-Press IT products

Products Used:

Fab Scraps Beach Comber Paper
Fab Scraps Beach Comber Chipboard

Adhesives
X-Press IT Sticky Barc

Firstly I did some prep work for the canvas, by giving it a coat of white paint and added some blue flecks into it. 

Painting the Canvas and adding blue flecks

I then set the canvas aside to dry and then painted my Ocean Waves Chipboard.

Painting Chipboard

Once the chipboard was dry, I then used some X-Press IT Clear Glue to coat the top, which creates an awesome clear gloss accent when dry.

X-Press IT Clear Gel Glue makes an excellent glossy coat.

Once the canvas is dry, I took some Beach Combers Patterned Paper, and cut it down to be about 7" wide, and then tore it into four pieces.    I have then used X-Press IT Triple Tac to adhere it to the canvas, in layers, with a layer of crumpled Cellophane between.


Using X-Press IT Triple Tac on Canvas

X-Press IT Triple Tac as Adhesive for canvas

Then, using the Triple Tac, I have used a cloud template, and put the triple Tac onto the template to create two cloud shapes and then sprinkled with Shaved Ice.  the Triple Tac is and excellent adhesive for applying these type of products.

X-Press IT Triple Tac and templates

I have then used some of the X-Press IT Sticky Bark, which is so easy to adhere to chipboard elements.  Just peel back the adhesive, then place your chipboard face down.   You then use a craft knife to cut around the outside of the chipboard element.

Using X-Press It Sticky Barc to cover Chipboard Elements

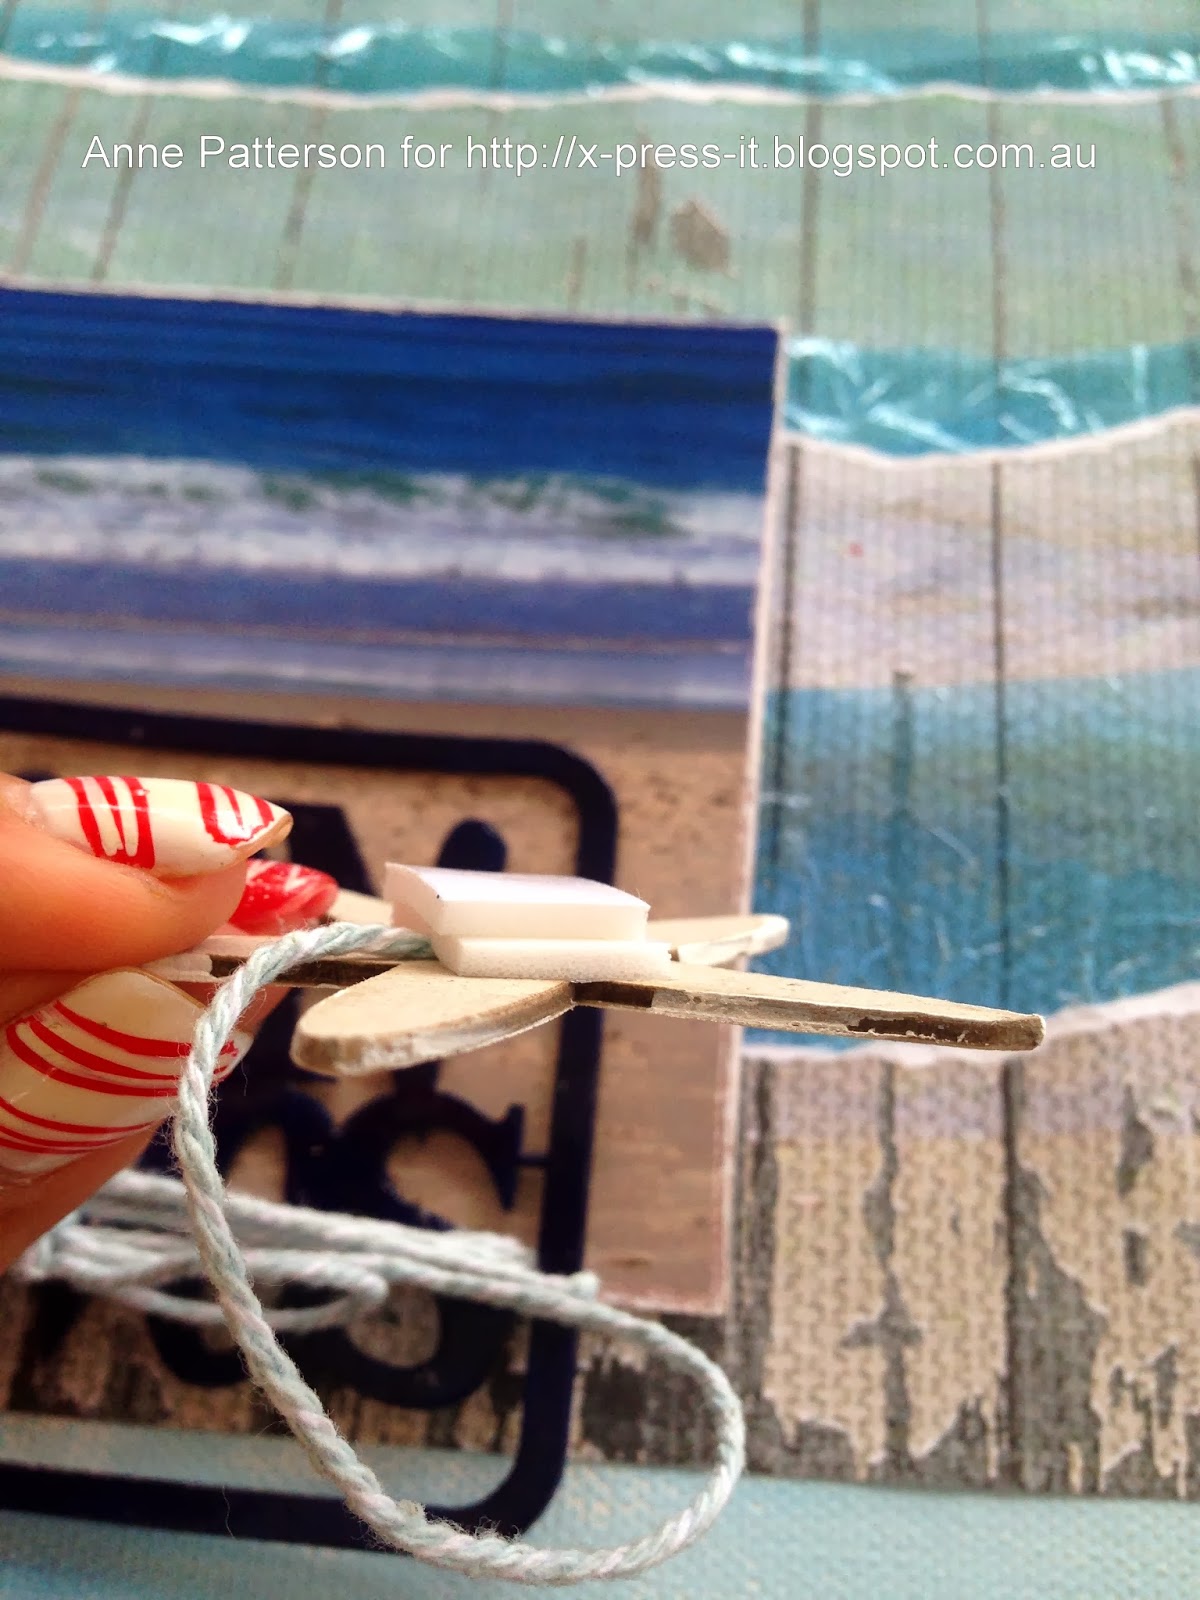
I love creating layers, so the next step was to start using some X-Press IT Foam Tape.
Using X-Press IT Foam Tape to add Dimension

Using it just gives a lift to some elements on your page.

Using X-Press IT Foam Tape to add Dimension

If you want to layer, so I wanted my picture to be on the same level as the lifted element, I made sure that I worked out where to put my Foam Tape before adhering it.

Using X-Press IT Foam Tape to add Dimension

Ever wondered how to make string stay in the right place.  Well I discovered the X-Press It Glue pen is THE solution.  Just draw where you want the string to adhere to then press the string into position.

Using the X-Press IT glue pen to adhere Twine

Need EXTRA lift, I am known to double up my foam tape.

Double Up on your X-Press it Foam Tape for extra Dimension

The X-Press IT Gel pen is also the perfect solution for adding little details of glitter.


And don't forget it is the PERFECT tool for gluing on your sequins.  Just draw a dot, where you want your sequin to go, then drop the sequin into position.

Using X-Press IT Glue Pen for Sticking Sequins in Place

After adding a couple of other embellishments, and doing some doodling, here is the final canvas.

Ocean Waves Canvas by Anne Patterson using X-Press IT Products.

Thanks for Looking

Pin It

Wednesday, December 11, 2013

Shabby Gate Album

Hi X-Press It fans.
Sharmaine here and today I’m sharing a step by step on how I created a frame using the FabScraps Shabby Gate Album.

IMG_0300

Products used:
FabScraps Shabby Gate album
Fabscraps "Shabbylicious" papers
FabScraps chipboard
Fabscraps filigree
Chromacryl paints
Lindy’s Stamp Gang Embossing Powder
X-Press It Double sided tape
X-Press It Clear Gel Glue

The very first thing I did was pulled out the back of the album and covered it with glue, using the X-Press It Clear Gel Glue. The quickest way, i’ve found, to do this is spreading it with a palette knife.

IMG_0303

Next I placed the glue side down onto some pattern paper.

IMG_0304

Using an emery board I removed the excess paper from the sides.

IMG_0306

I repeated this process for two of the page inserts and using my finger I then added some paint around the edges.

IMG_0313

I also added a coverage of paint to the gates

IMG_0315

Before stamping over them with a text stamp and then embossed this with some Silver Moon Sapphire Embossing Powder.

IMG_0316

I then added some touches of blue ink

IMG_0318

Before adhering the gates to the page inserts.

IMG_0319

Next I repeated the stamp/emboss process to a piece of FabScraps chipboard

IMG_0320

And a metal butterfly.

IMG_0323

I added some more pattern paper (also distressed and inked) to the back

IMG_0322

And then put the frame together, tying it up with some ribbon.

IMG_0324

I used a post card instead of a photo.

IMG_0329

Really like the subtle texture the embossing creates.

IMG_0331

I also left enough room so you could add either a landscape or a portrait 4x6 photo.

IMG_0333

I didn’t fully glue the “Together” down so that a new photo could easily be tucked in behind.

IMG_0332

Think this would make a great wedding gift,

IMG_0334

Or even for Christmas.

IMG_0335

Hope you are feeling inspired to create.
Happy Christmas to you all and I wish you all the very best for the New Year.
Happy creating
Sharmaine

Pin It

Wednesday, December 4, 2013

Washi-licious Christmas

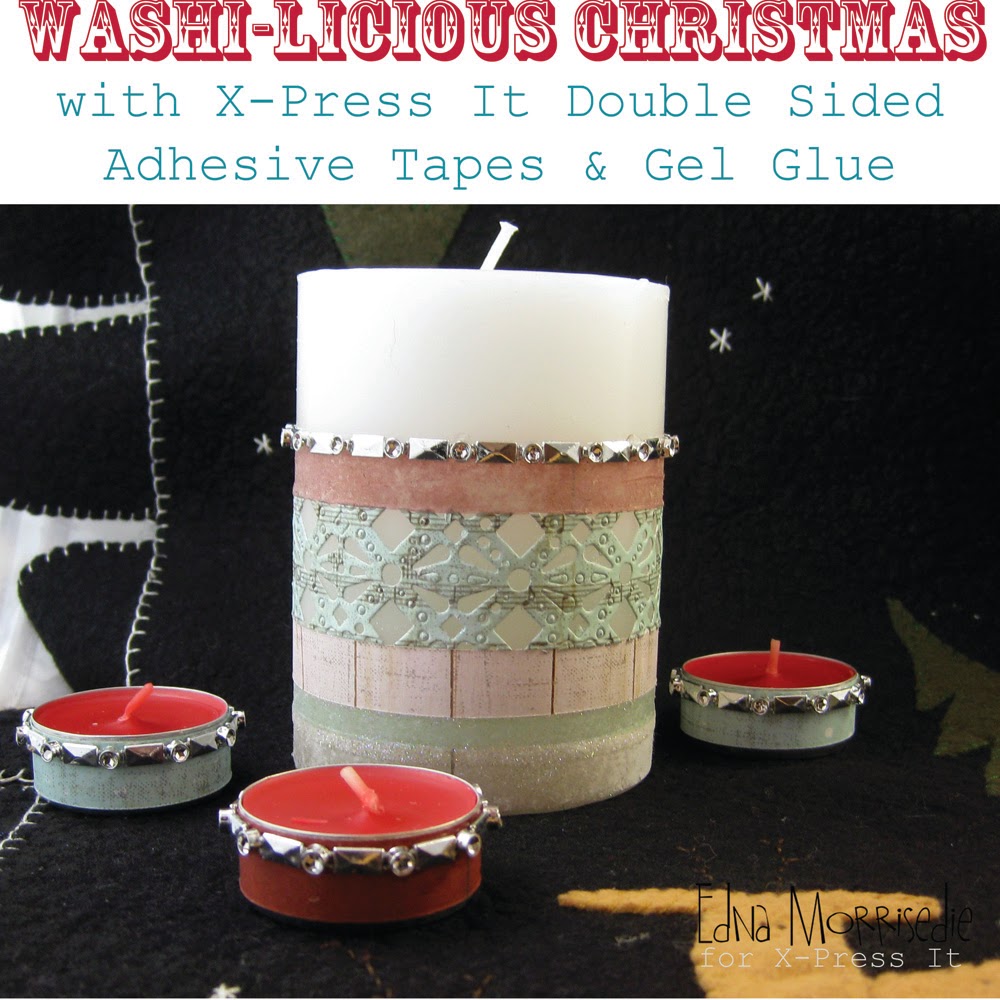
It is definitely time to get the Christmas Decorations out, and this week I am revisiting faux washi tape techniques with the festivities of the season in mind.  It is amazing what a difference a few strips of paper can make to some pretty generic household candles, here is what I started with today:


I wanted to make one feature candle to sit in the middle of a table runner, and then to have different, but co-ordinated, tea-light candles to add to the mix.  With the feature candle I have used two different types of faux washi tape.  The first applies the tape directly to the paper, in multiple strips and then you splice away the strips of faux washi tape.


With one of the strips I have used a cutting die plate to give extra form to the design, the double sided adhesive cuts like butter in any die cutting machine and rarely leaves any residue behind.  This works the same with X-Press It Double Sided Adhesive Sheets too, I just used a double strip of adhesive tape today, the choice is yours.


The second technique sees strips of paper firmly pressed into strips of 12mm Double Sided Adhesive.  Once the paper is adhered, good side down, spritz or brush with water and rub away the backing paper to reveal the very fine upper layer of the paper.  This is like the paper transfer technique used with X-Press It TripleTac, but achieved with Double Sided Adhesive.   You need to be gentle with the rubbing, but the work is worth it to have a different texture of faux washi tape, with a transparent effect as your end result.

DIY Washi Tape Tutorial using X-Press IT Double Sided Adhesive Sheets, by Edna Morrisedie

For the tea light candles, the idea was to cover up the silver exterior of the candles with faux washi tape, co-ordinating the look with the feature candle.  This is simply achieved by using the tape to paper technique from above, I used 12mm double sided adhesive tape for these and it works a dream. 

I have added faux metal embellishment to the tea lights and around the top of the papers on the candle to bring them together.  I adhered these elements with X-Press it Clear Gel Glue

Once the strips of faux washi tape were ready I layered them up the base of the candle, leaving room to run 3mm double sided adhesive around the base of the candle, you can see it in place in this picture.  All I did to apply the glitter is simply remove the backing and rub some fine glitter into the adhered space to add yet another texture to your festive candle.


This is a quick and easy way to bring to add some festivity to your tables and general decorations this Christmas, or all year round with any types of paper and decorations that you prefer.  Double Sided Tape is my most used X-Press It product, its uses are endless, here is what I used in my project today:

X-Press It 3mm Double Sided Adhesive
X-Press It 6mm Double Sided Adhesive
X-Press It 12mm Double Sided Adhesive
FabScraps Papers
X-Press It Clear Gel Glue

And here are my candles out on my very precious felted table runner:


There is still plenty of inspiration to come from the X-Press It Blog this year, however, this is my last tutorial for this year, so may I say thanks for tuning in and all the best for the season... however you may celebrate it!  I look forward to seeing you all in 2014.... EDNA.Pin It