Monday, October 28, 2013

X-Press It Glue Marker Test Drive

A couple of weeks ago, we made a call out on the X-Press It Facebook page, for some clever crafters to try and review the new X-Press It Glue Markers. If you missed it, we have added a Wide and Pen Glue Marker to the X-Press It Range. We are super excited to share our first review with you, from Natalie.

Natalie's Review

I had such fun playing around with the glue markers. After a bit of experimenting with different techniques I found that they work really well with my super-fine glitter. So I gathered a few supplies, including all 3 X-Press It Glue Markers and went to work creating these fun and simple cards.


For my glitter technique I started with the Wide marker. Using a ruler I 'drew' a straight line of glue across the bottom of my card, sprinkled it with glitter and shook off the excess. I repeated this process with both the Regular and Fine markers. At first I was concerned the Fine marker wasn't working as I couldn't see the glue, but it was soon revealed to be all ok when I sprinkled the glitter over it. It was just so fine I couldn't make it out! But this stuff is super-strong too, and doesn't have a problem keeping the glitter in place. I think this will also be excellent for doing really small detail work, like filling in parts of stamped images.


Well, that gives me more ideas now... so I'm off to play. Thanks for letting me test drive your new products. I'm definitely going to be using them more!

-Natalie

You can see more of Natalies work on her blog: https://www.facebook.com/onescrappydoctor or blog: http://onescrappydoctor.blogspot.com/

Pin It

Wednesday, October 23, 2013

A Glitter Pumpkin With a Twist!


Hi all, its Sascha from X-Press HQ! When I'm not working behind the scenes, I get to play with my favourite X-Press It products. Since Halloween is fast approaching, I have decided to make my own version of a Glitter Pumpkin. There are heaps of different ideas floating around Pinterest and similar websites at the moment, so I thought it would be fun to create a new idea and use X-Press It Double Sided adhesive sheets!

First I gathered all of my materials:
- A Pumpkin, I used a Kent (You could use any sort, like a Butternut or carving pumpkin)
- One X-Press It double sided adhesive sheet
-Glitter
-Scissors


Cut out your desired shapes from your Double Sided Adhesive Sheet, to form the face. I went with the triangles for my nose and eyes, then a stitched look for the pumpkins mouth. Find the best side of your pumpkin, peel one side of the backing paper off your cut outs and position them on your pumpkin and press firmly.


Carefully peel the other sheet of backing paper off. If you are going to use different colours of glitter for different areas, only peel the backing off when you are ready. I decided to do two different colours for the eyes, so I peeled the backing off, trimmed it, then repositioned it.


Now for the fun part! Add your glitter! Pour the glitter onto the exposed sheet and gently rub it in with your finger tip. Dust off any excess glitter. Make sure you are working over a surface that you can use to collect your excess glitter.


 This is how each area will look after you have added glitter. Repeat the same process for each different colour.


After I had glittered the pumpkins face, I decided that looked like a cat, so I cut out a set of ears and whiskers out of X-Press It Blending Card and completed the same process (Double Sided Adhesive sheets and Glitter!)

This was the final result! Hello Sparkly Glitter Pumpkin Cat!


I hope you have enjoyed my tutorial. Don't be afraid to leave a comment, we love to hear and see what you have been up to.

Happy Halloween! - Sascha

PS... A little birdy has told me to tell you that it would be worth your while to make sure you visit this blog on Halloween... *wink wink*

PPS Did you know that X-Press It is on Pinterest and Instagram!? Follow us, it would make me SUPER happy!

Pin It

Wednesday, October 16, 2013

Shabbylicious Embossing

Hi X-Press It Fans.
Sharmaine here sharing a layout I made using several products from X-Press It.

Lindy’s Stamp Gang Embossing Powder
X-Press It Double sided tape
Fabscraps "Shabbylicious" papers
Fabscraps button and pearls
Chromacryl paints
Fabscraps filigree
Fabscraps "Shabbylicious" stickers

I started by creating my background paper, using cardstock and some watered down paint.

I then used some of the pattern paper to back my photo and to type up my journaling.

The next step was to emboss the metal filigree.

I covered the metal with paint

and coated each using both “Silver Moon Sapphire”

and “Adobe Fire” embossing powder.

I didn’t completely cover all the metal, I left little bits of paint showing through,

and heated the powder.

I then cut each filigree in half.

I then used the blue paint, diluted with water,

and coated a paper doily.

Which I also cut in half.

IMG_9513

I then cut out a bird, from one of the pattern papers in the “Shabbylicious” range, and added it to my page.

IMG_9514

I also added a “Shabbylicious” sticker

IMG_9515

I added some Fabscraps pearls and buttons

IMG_9516

to complete my page.

SharmaineKruijverXPressItWattleBirdLayout

Love that supplies, like paint and embossing powder, give you the power to alter.
I hope this has inspired you to look at the embellishments you have and see if you can alter them with some paint or embossing powder.
Have a wonderful week.
Sharmaine

Pin It

Wednesday, October 9, 2013

Delightful Dribbling with X-Press It Blending Card

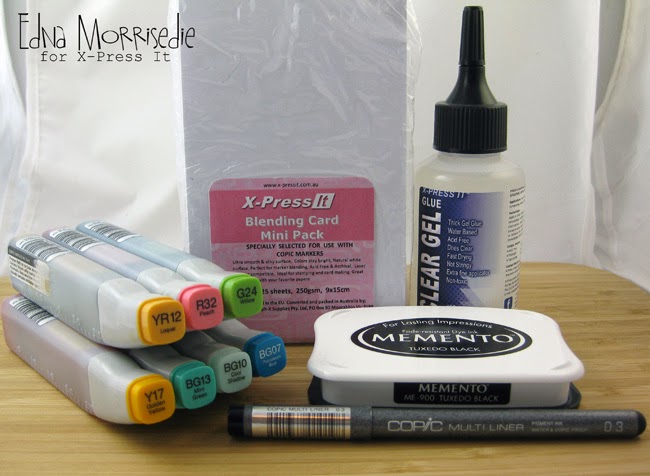
Welcome back to the X-Press It Blog for another tutorial!  Today I am focussing on X-Press It Blending Card and the option for Direct Ink Application.  Most card makers used X-Press It to colour stamped images, today I am using a direct application of ink to the Blending Card in a saturated form…. Here is what I started today’s tutorial with:


Most of us know that X-Press It specifically developed their Blending Card for use with Copic Markers, it is bright white, robust (250gsm), silky smooth and a perfect surface for holding and blending the wonderful copic ink.  One of its defining characteristics is that it carries the ink all the way through the paper and allows for everything from top surface colouring through to full saturation.  I thought a little encouragement book would be a good way to show how delightful full colour saturation can be….

I started with a single A4 sheet of Blending Card, and used a scoring board to help with the book fold creases… here is a little link to a book fold diagram if you haven’t done one of these before; I put an extra cut in my fold method to allow for the thickness of X-Press It Blending Card, adjust to your preferences…


Once I had the book folds in the order that I wanted them to finish in I secured the book in this form with paper clips.  Then I prepared for inking by selecting three Blue|Green and one Yellow Various Inks.


From the top of the clipped card stack I dribbled ink, starting with the darker Blue|Green from the LHS, working down in depth of colour and across the top of the paper, finishing with the Yellow on the RHS… I chose these colours to represent sky and sunshine, but you could do this with any rainbow of colours.  You could add enough ink to cover all the Blending Card, or as I have done with varying amounts to form a dribbled look, but still leave open space.  It is a little messy, just remember to keep your card upright and let gravity do the work for you to get the ink to fall in between and down the pages…


I added some page definition in the form of little borders, this was simply achieved by doodling with a Copic Multi Liner (Black 0.3), the colour concentration provided by these liners will never disappoint, black is sooo black, I love it!


To carry the colour saturation theme, I punched a series of elements from X-Press It Blending Card to build embellishments.  Rather than cut into another piece of A4 I reached for a couple of pieces of my ever present X-Press It Blending Card Mini, they measure in at 9x15cm which is perfect for image stamping, and also for die cutting from Blending Card.  You can see my stack of little punched out card in this image, and you will also note that I have stitched through most of the pieces to add texture.


Because I used X-Press It Blending Card to make the punchies, adding extra colour to them is an absolute breeze, I just dribbled ink onto each one in the colour needed.  You can achieve the same colour saturation with a Copic Marker, it just takes a little longer, just keep colouring until you have achieved total saturation through to the back of the paper, you can still blend if you want to as well, but I opted for solid colours to keep with the bright feel of my little book…. Lots of possibilities, just start and see where your art takes you….


One other important note is with regard to the thread that I used, it was just simple embroidery thread, I wanted to show that you can:

  • Use a black thread and the ink will not interrupt the definition between the black and the colour you chose to saturate the card with.
  •  Use coloured thread, and the ink may deepen the colour of the thread a little, but when using lighter shades not to a point of obvious difference.
  •  You could also opt to just use one colour of thread, like all white or cream, and it will take on the colour of the ink to add tone on tone definition.

Then it was a case of adding the embellishments to the book with X-Press It Clear Gel Glue… I inserted some encouraging sentiments as a starting point, and then filled space with the punched embellishments.  You will note that my Multi Liner came out again, and there are a few little sprinklings of rhinestones and the like to finish off, but in general the only thing in this book is X-Press It Blending Card and Copic Various Ink.


Here are the X-Press It Products used in the tutorial today:
X-Press It Blending Card
X-Press It Clear Gel Glue
Copic Sketch Markers
Copic Various Inks
Copic Multi Liner Black 0.3
Memento Tuxedo Black Ink


I hope you enjoyed this tutorial and are encouraged to experiment with your X-Press It Blending Card…. I thought I wasn’t into bright, but I think I have just changed my own mind, enjoy... EDNA!
Pin It

Wednesday, October 2, 2013

FabScraps Cog Album--Layered Page with Anne Patterson

It is Anne Patterson here and I have had the fun task of creating with the Fab Scraps Cog Album and a variety of X-Press IT Products.


The first step I took was to coat the front cover with some Pewter Distress Stain.


The great thing about the X-Press It Glue pen is you can use it for embossing and so I have added some details onto the cogs using the glue pen. 


I have then sprinkled the details with embossing powder.


You then wait for the glue to dry for a little and then you can heat set the powder with your heat gun.


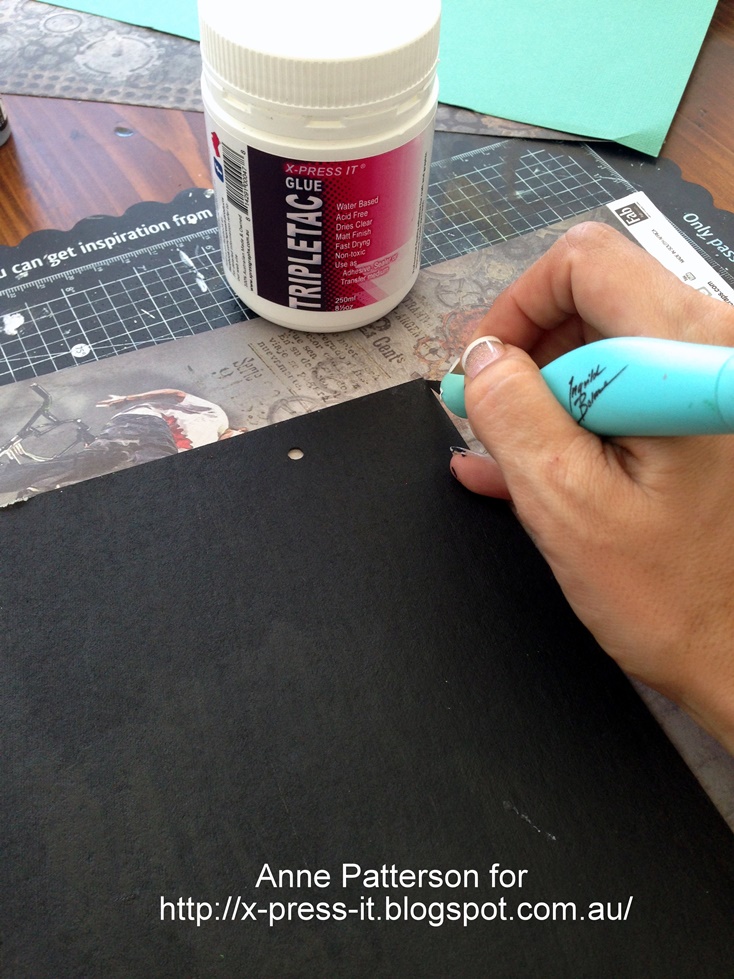
 I have then coated the back page of my album with Triple Tac Glue, and then pressed to the patterned paper.


Then you cut off the excess paper.

I have used some patterned paper to create a pocket to hold some certificates.  i folded over the edge to make it easier to slide the certificates in.


I have then used X-Press It 6mm Double Sided tape long the bottom and sides of the back of the patterned paper.   This I then adhered to the back of one of my album pages.


 I have used my X-Press It 12mm Double Sided tape to adhere some cardstock to the patterned paper background.


I have then used my X-Press It Clear Gel Glue to adhere the additional cog and title embellishments
to my page.


To give the cover a little extra lift, I have put the cover picture on some X-Press it foam tape.


Products I have used in my project are:

X-Press It Tripletac Glue
X-Press It Double-Sided Tape 6mm 
X-Press It Double-Sided Tape 12mm
X-Press It Clear Gel Glue
X-Press It Glue Pen
FabScraps Cog Album
FabScraps Wild at Heart Patterned Paper
FabScraps Wild at Heart Clear Stickers
FabScaps Die-Cut Chipboard Word Rough & Tough

Here is the final project:


The cog album cover lifts to reveal pictures on the inside.


The inside page lifts again to reveal the pocket page with the mining permits, and some more pictures of our outing.


This is a great way to use and create an interactive page, with lots of space for pictures and moments and the process is very similar if you create the whole album instead of a page, but I hope you have enjoyed my share.

Thanks for Looking
Anne
Pin It