Sunday, April 15, 2012

Cards and Masking..

Today I wanted to share a project I recently finished using Xpressit Mask It  sheets.

I began with an ampersand mask that I had in my stash but I wanted the masked section to be the negative of the shape not the outside.
So I grabbed a mask sheet and traced around the ampersand with a pencil.

I then carefully cut out the shape with a craft knife.

 I peeled the backing off and carefully placed it onto my pattern paper then lightly sprayed with my mist. I let it dry for a minute and then carefully peeled off the mask sheet to reveal the ampersand.
I completed my card with some co ordinating papers and embellisments.


We have a prize again this month... leave us a comment  for your chance to win a pack of X-Press It Double Sided Adhesive Sheets--our feature product for next month!

We will randomly choose one commenter from this month's posts to win this  prize!
KimPin It

Wednesday, April 11, 2012

The Mystery of a Mask

This month we are featuring Mask It, when they say this is a masking film they really mean it, which is the best thing about this product!  Many masking products are just too thick to use with stamps and the like as they have too much of a lip, which inhibits the stamp expanding across the full opening… added to this…. it cuts like butter!  So much so that a light pressing with a scalpel slices through the backing paper and the masking film, THANKFULLY as there was a fair bit of cutting in my project today!
I added a damask design to the front of a two drawer storage unit, this is one of the flat pack ply drawers from IKEA, mine was already assembled, if you are doing this from scratch it will be a lot easier to apply the design before assembly, I have worked around that today thanks to the flexibility of Mask It.
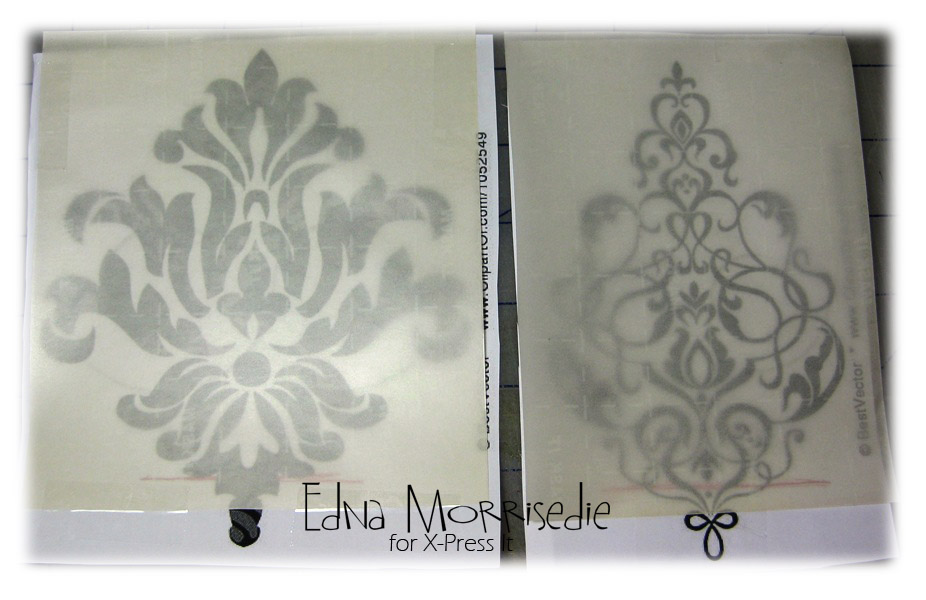
Building a mask is as easy as choosing an image, this could be an extension of an existing stamped image, something you draw up yourself, or do what I did and search for images in the style you are looking for.  I simply Googled “Damask” to choose my design today, and found two damask designs that fit inside one another.  I used the entire broader image and a selection of the finer image.

I stuck the Mask It to my design with sticky tape to keep it in place for the cutting stage.  This is the most time intensive phase of masking, however, is well worth the effort as you will have the mask ready for multiple uses.


When it comes to applying your mask don’t worry too much about exact placement the first time, one of the great features of Mask It is its low-tack adhesive, it moves around easily and sticks when you need it to.  If you plan on repeating your design on elements that need to align, like side by side drawers, it is best to establish a marker.  In this case the peak of the damask sits just below the centre drawer pull notch.

I used a stipple brush and a dry coating of red paint for the base design, I find multiple light layers of paint best for this type of design.  If your paint is too wet you won’t get an even application, just dry off your brush on scrap paper in between applications….

After applying the red paint, I left the mask in place and covered the red design with stamped text.  I used an acrylic stamp for this, with cream paint, you can also use permanent ink.  I wanted the text to be a little rustic, so I rubbed off some of the cream paint with a paper towel before pressing the stamp across the design. 

Once happy with the double application of paint, I removed this mask and applied the finer detail damask mask. 

Using the same method I then applied the pink paint to the drawer front.

Simply repeat the steps on the other drawer and your design is finished.

Save your masks for future use… I am going to try airbrushing with mine next!  That will be right after I cut out a die cut frame and build a shadow for a detailed die cut on a card... endless uses...

We have a prize again this month... Show some love for your chance to win a pack of X-Press It Double Sided Adhesive Sheets--our feature product for next month!

We will randomly choose one commenter from this month's posts to win this fabby prize!

Pin It

Wednesday, March 21, 2012

Easter is Coming......

Hi everyone!!!
It's Tarrah here today to show you how to create another project using the wonderful X-Press It Triple Tac product.
I have created a very cute Easter Egg Tree using the Triple Tac and this is how I started....

Gather all the supplies you will need to create with....I got all my supplies bar the Triple Tac from Spotlight.... 

Triple Tac is a rather runny consistency so use a paintbrush for easy application

Start by applying the medium right around the bottom of the foam piece

 Next apply a liberal amount to the actual glitter egg itself 

 and adhere this to the bottom of the tree

do this for all the eggs until you have them going right around the bottom of your tree

make sure you mix up the colours as you go....

take some of the shredded paper and adhere in between the eggs to hide the foam and to add a different texture

 continue with both the eggs and the shredded paper until you have worked right up to the top of the tree, 
I used smaller eggs as I got nearer to the top

take a scrap piece of cardstock and punch out a shape to make a title for your tree 

adhere your title to the punched shape

and adhere this to the egg tree

add a cute little chicken to the top of your tree just like a star or an angel for Christmas and there you have it a cute little Easter Egg tree decoration for your table at Easter!!

 We would love to see you create an off the page, canvas or mixed media project and if you leave a link here to your project you might just win yourself a pack of Mask It by X-Press It. You have until the end of the month to link your project so get creating!!!!
Don't forget to check back here to see if you are a winner next week and there will be loads more inspiration and another prize up for grabs again next month too so stay tuned.........:))


Pin It

Wednesday, March 14, 2012

TripleTac by Name, Fabulous by Nature!

It was great to combine an X-Press It Canvas with this month's feature product TripleTac to produce a little name plate. This would be great for a door or bookshelf in a little person's room and is a great way to use up scraps of paper.  Here's what I started with:

I wanted blocks of colour on my canvas, so chose co-ordinating papers from a paper pack, the green stays the same in both sections, however the blue sections are different but co-ordinating papers. Papers tear nicely and are easily reapplied with TripleTac; giving great texture to your canvas.  Simply apply the TripleTac straight to the canvas and then atop your papers as you lay them onto the canvas. This will seal the paper to the canvas and make it ready for the next layer of elements.

For the letters I printed and cut out outline text on standard copy paper, using these as a guide to apply strips of crepe paper. Simply apply the TripleTac to the letter guide and then continue to dip your brush, a solid texture brush in my example, into the TripleTac whilst bunching up your crepe paper. The TripleTac will transfer nicely onto the crepe paper and allow it to bunch up and stay with ease. Another great characteristic of TripleTac is that it dries clear and is easily painted; my letters started out white but changed colour towards the end…

Once the letters were built I assembled elements across the canvas, starting with the Sun and Pinwheel Poles.  Add extra texture to your background with paint or pens, I used some bubble wrap and white paint in this example. And a yellow paint marker once I added the paper sun and its rays….

Then it was time to add the 3D elements.  Once they were in place I chose to use some of the open space for a paper birdie... I also added a brown paint outline to the white letters with a paint pen.  At this stage the letters and pinwheels are looking pretty "clean" which is in direct comparison to the style of background...

At the final stage I added more texture to the canvas.  First by painting the letters red, which picked up the least dominant colour in the pinwheels.  Then it was just a case of adding paint across the piece, both brown and white.  I used my fingers for most of this, but also a piece of mesh to add patterned texture.  The best thing about using TripleTac is that the canvas is sealed by way of your creative process, all ready for the wear and tear of a child's room.  I hope you join us by making a canvas this month, please let us know if you do by leaving a comment, one lucky participant will be randomly selected to win a fabulous Mask-It pack from X-Press It!!!  Here's the finished canvas:
Pin It

Wednesday, March 7, 2012

pretty canvases

Hi again its Kim here with a new tutorial for creating a canvas. Last month I created a mixed media piece with lots of bright colours. This month I wanted a more pretty sophisticated look to my canvas.
I started off with an 8 x 10 canvas and some acrylic paint. I watered down my paint till it was quite thin and painted a wash over the entire canvas.
Once that dried I sprayed some co ordinating glimmer mist onto my canvas by swiping my hand across canvas. I misted it quite randomly so some areas had more colour and shimmer than others.

My next step was to to embelish my canvas. I took some raw chipboard circle pieces, cut out a circle of pattern paper then used the triple tac to adhere the paper to the chipboard piece.

Once that was dry I adhered the chipboard pieces to the canvas using the clear gel .

I made a few different handmade flowers and leaves, including these leaves. I cut out  a leaf shape. Inked the edges then used my finger nail to rough up the edges and manipulate the shape. I glued these and all the embellishmnets with the clear glue gel.
 and here is my finished project.!

This month we would love to see you create a canvas or mixed media piece and leave us a comment with  a link to your project.  The winner will recieve a  mask it pack from X-pressIt!
...and before I go last months winner was Robyn. Please email sascha@xpressgraphx.com.au   to claim your prize.
Don't forget to come back next Wednesday for some more inspiration from Edna!
 KimPin It

Tuesday, February 14, 2012

Meet the NEW X-Press It Design Team


We are really excited to announce the addition of two new design team members for the X-Press It Blog.
The following two people will be joining Kim. Introducing...

And

We can’t wait to see their amazing creations and look forward to bringing you fun and exciting tutorials.
Pin It

Wednesday, February 1, 2012

Canvas and masking tape..

This month I would like to share a quick and easy tip using X press It's masking tape. Why for masking of course!!!!!! Now I am totally not an arty lets get messy type of girl but when Sascha from X pressit it sent me this 12 x 12 stretched canvas I just had to have a play. I created my very first mixed media piece.
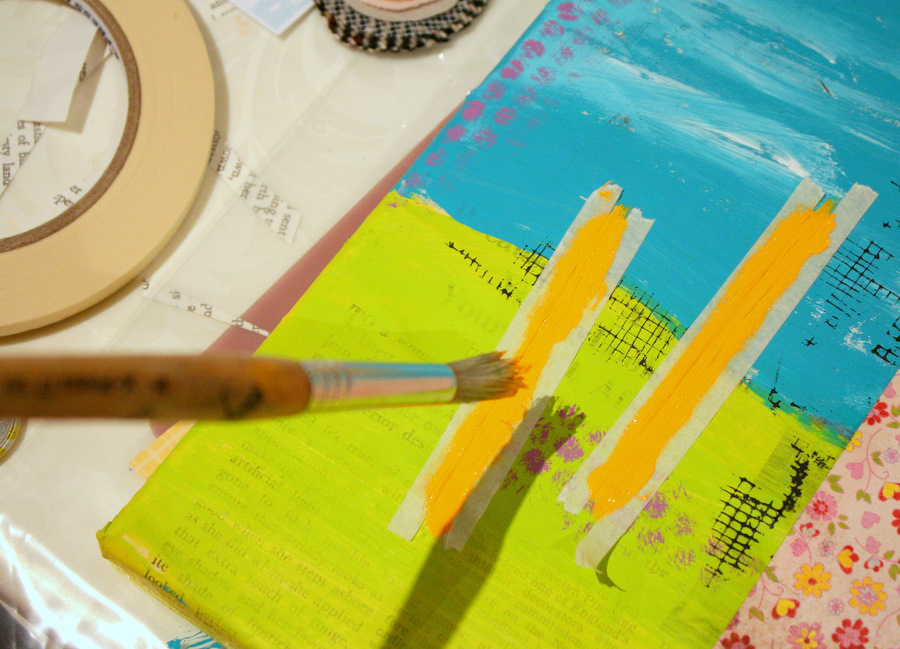
Once I had painted  my back ground  I grabbed some of the thin masking tape and masked off an area to create my flower stems.
 I then loaded up my paint brush with my paint and dabbed the colour on.  I then peeled the tape off and I had my stems. I loved the fact that the masking tape is low tack so It comes off easily with out removing any of the paint underneath!
 and here's my finished canvas!


Now would you like to win some goodies....
Create a project, layout, card or even a canvas and use masking tape to mask off an area. Link up your project in our comments area and be in the chance to win an 8x8 canvas and a roll of masking tape!
Competition closes February 29th....
and before I go the winner of our last months competition is Edna!!! Please email Sascha at  Sascha@xpressgraphx.com.au  to claim your prize!
I hope to see you play along!
Kim JeffressPin It